The Most Irresistible Puppy Chow Recipe Your Crowd Will Devour
The first time I made Puppy Chow, I was twelve years old and barely tall enough to reach the stovetop without a step stool. My aunt had scrawled the recipe on a torn piece of notebook paper, and by the time the powdered sugar cloud had settled all over the kitchen counter — and my shirt — I had already eaten half the batch straight from the bag. It was chaos. It was perfect.
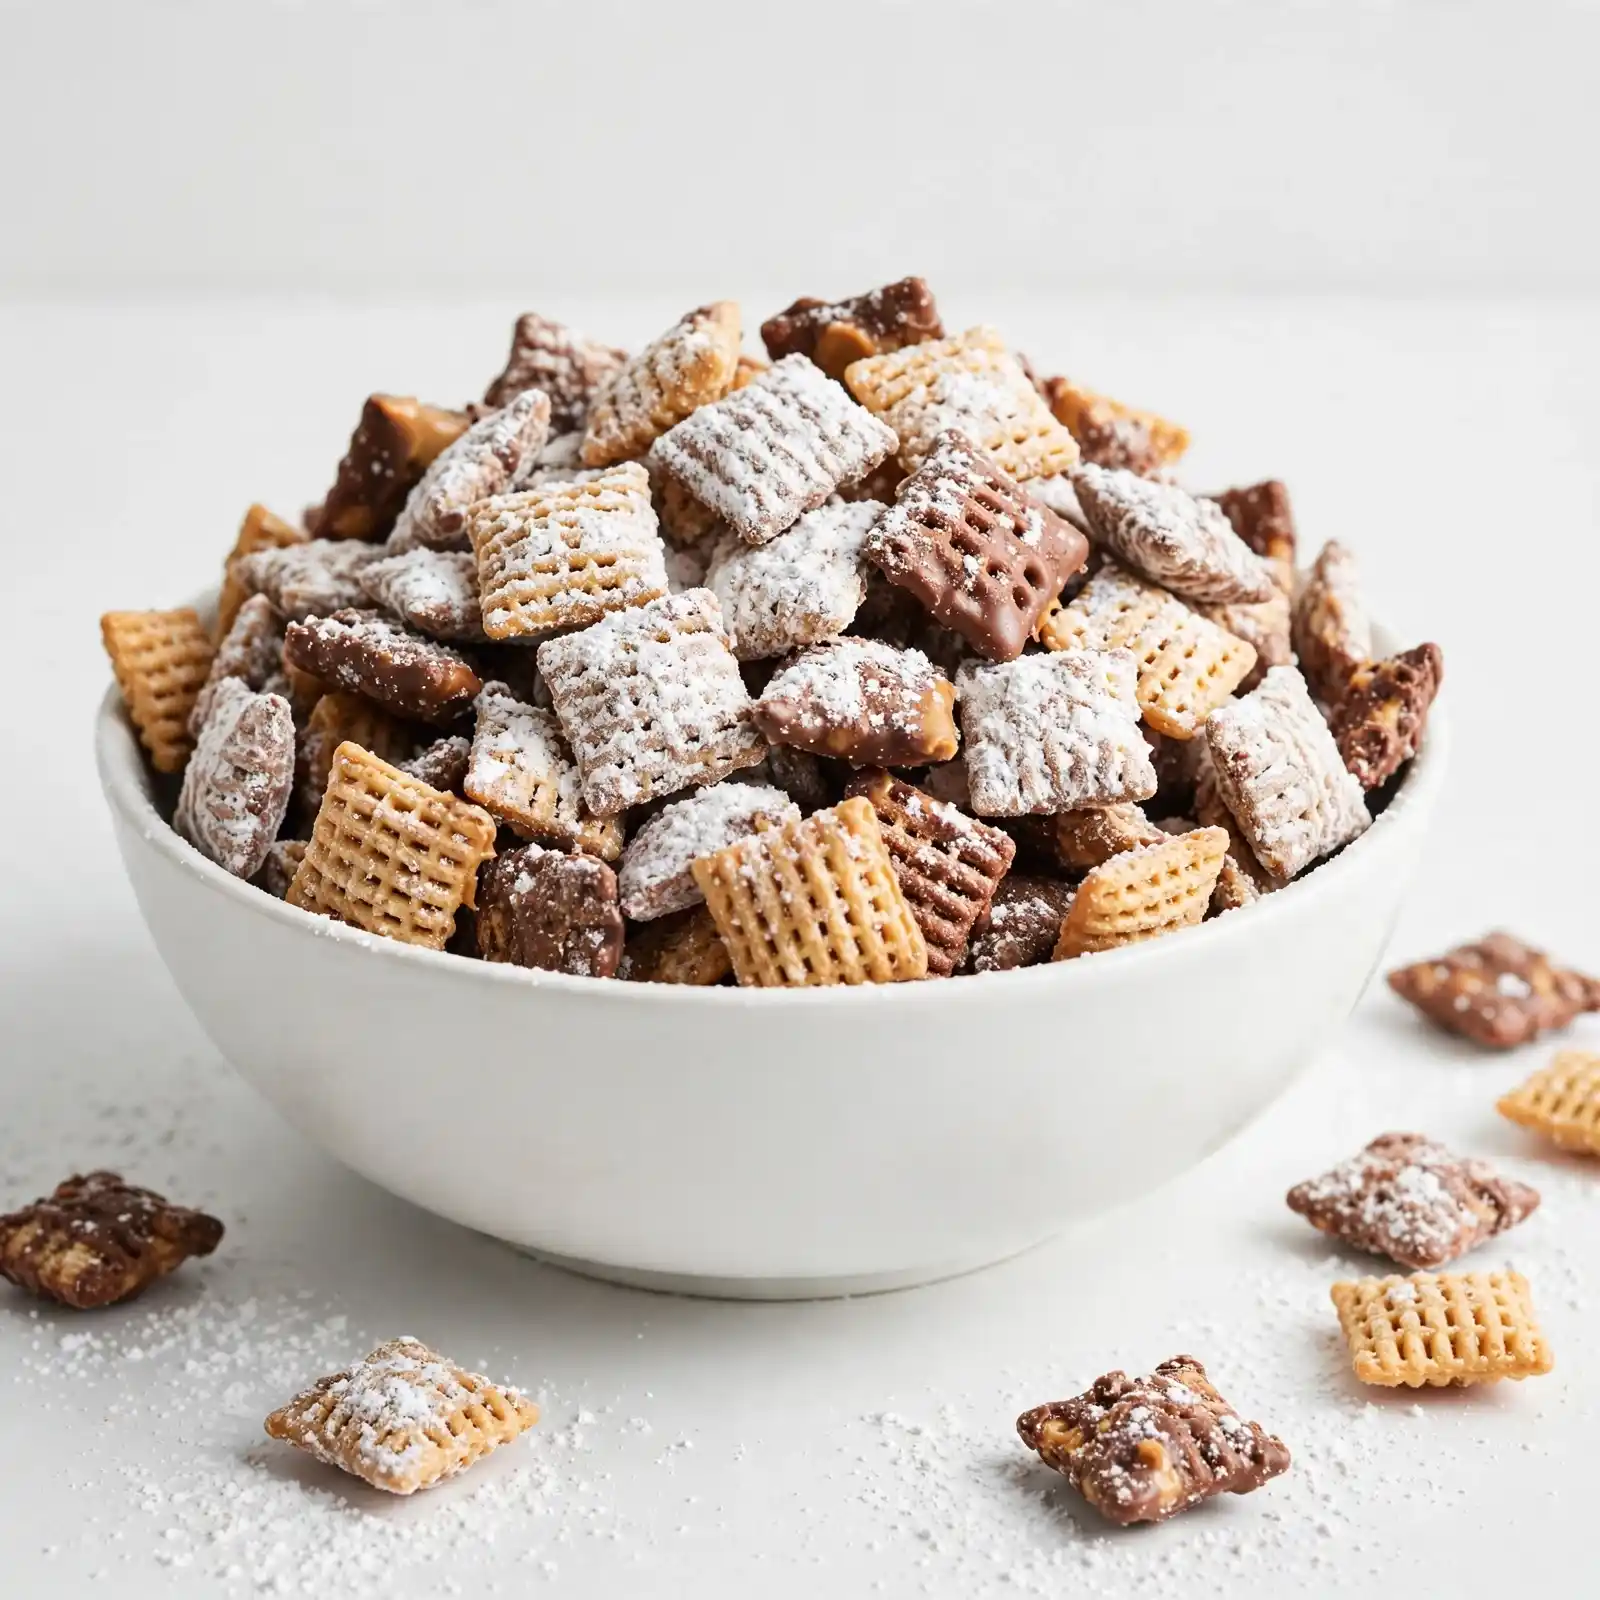
What comes out of that shaking bag is somehow greater than the sum of its parts: crispy rice cereal squares coated in a glossy layer of melted chocolate and peanut butter, then buried under a mountain of fine powdered sugar until every single piece is blanketed white. The texture is that addictive combination of light and crunchy with a coating that melts the second it hits your tongue, carrying a rich, nutty sweetness that’s nearly impossible to stop eating.
Whether you’re bringing a crowd-pleasing snack to a holiday party, filling treat bags for a school event, or just looking for an easy no-bake dessert to whip up on a lazy weekend, this recipe delivers every single time. It comes together with just a handful of pantry staples, and it’s the kind of thing that disappears from the bowl faster than you can refill it. A few people still call it muddy buddies — same magic, different name.
Why You’ll Love This Recipe
It Tastes Like Pure Nostalgia
There’s a reason this recipe has been a staple at potlucks and holiday tables for decades. The combination of chocolate and peanut butter hits that sweet, salty, rich note that people of every age respond to instantly. One bite and you’re back in someone’s warm kitchen, fighting your cousins for the last scoop.
The Texture Is Completely Addictive
Crunchy cereal, smooth chocolate shell, and that powdery sugar coating create three distinct textures in every bite. Nothing goes soggy. Nothing gets sticky. It stays crisp and snackable whether you’re eating it fresh or pulling it out of a bag two days later.
It Couldn’t Be Easier to Make
No oven required. No candy thermometer. No complicated timing. The whole process takes about fifteen minutes of active work, and most of that is waiting for the chocolate to melt. If you can stir and shake a bag, you can make this.
Perfect for Sharing and Gifting
This recipe scales up beautifully and transports like a dream — just seal it in a zip-top bag or a festive tin and you have an instant gift or party contribution. It’s one of those recipes that always makes you look more prepared and thoughtful than you actually were.
A Classic That Welcomes Creativity
The base recipe is wonderfully forgiving and practically begs you to riff on it. Swap the peanut butter for almond butter, toss in some festive sprinkles, or drizzle with white chocolate — the canvas is wide open and every version is delicious.
Ingredients
For the Base
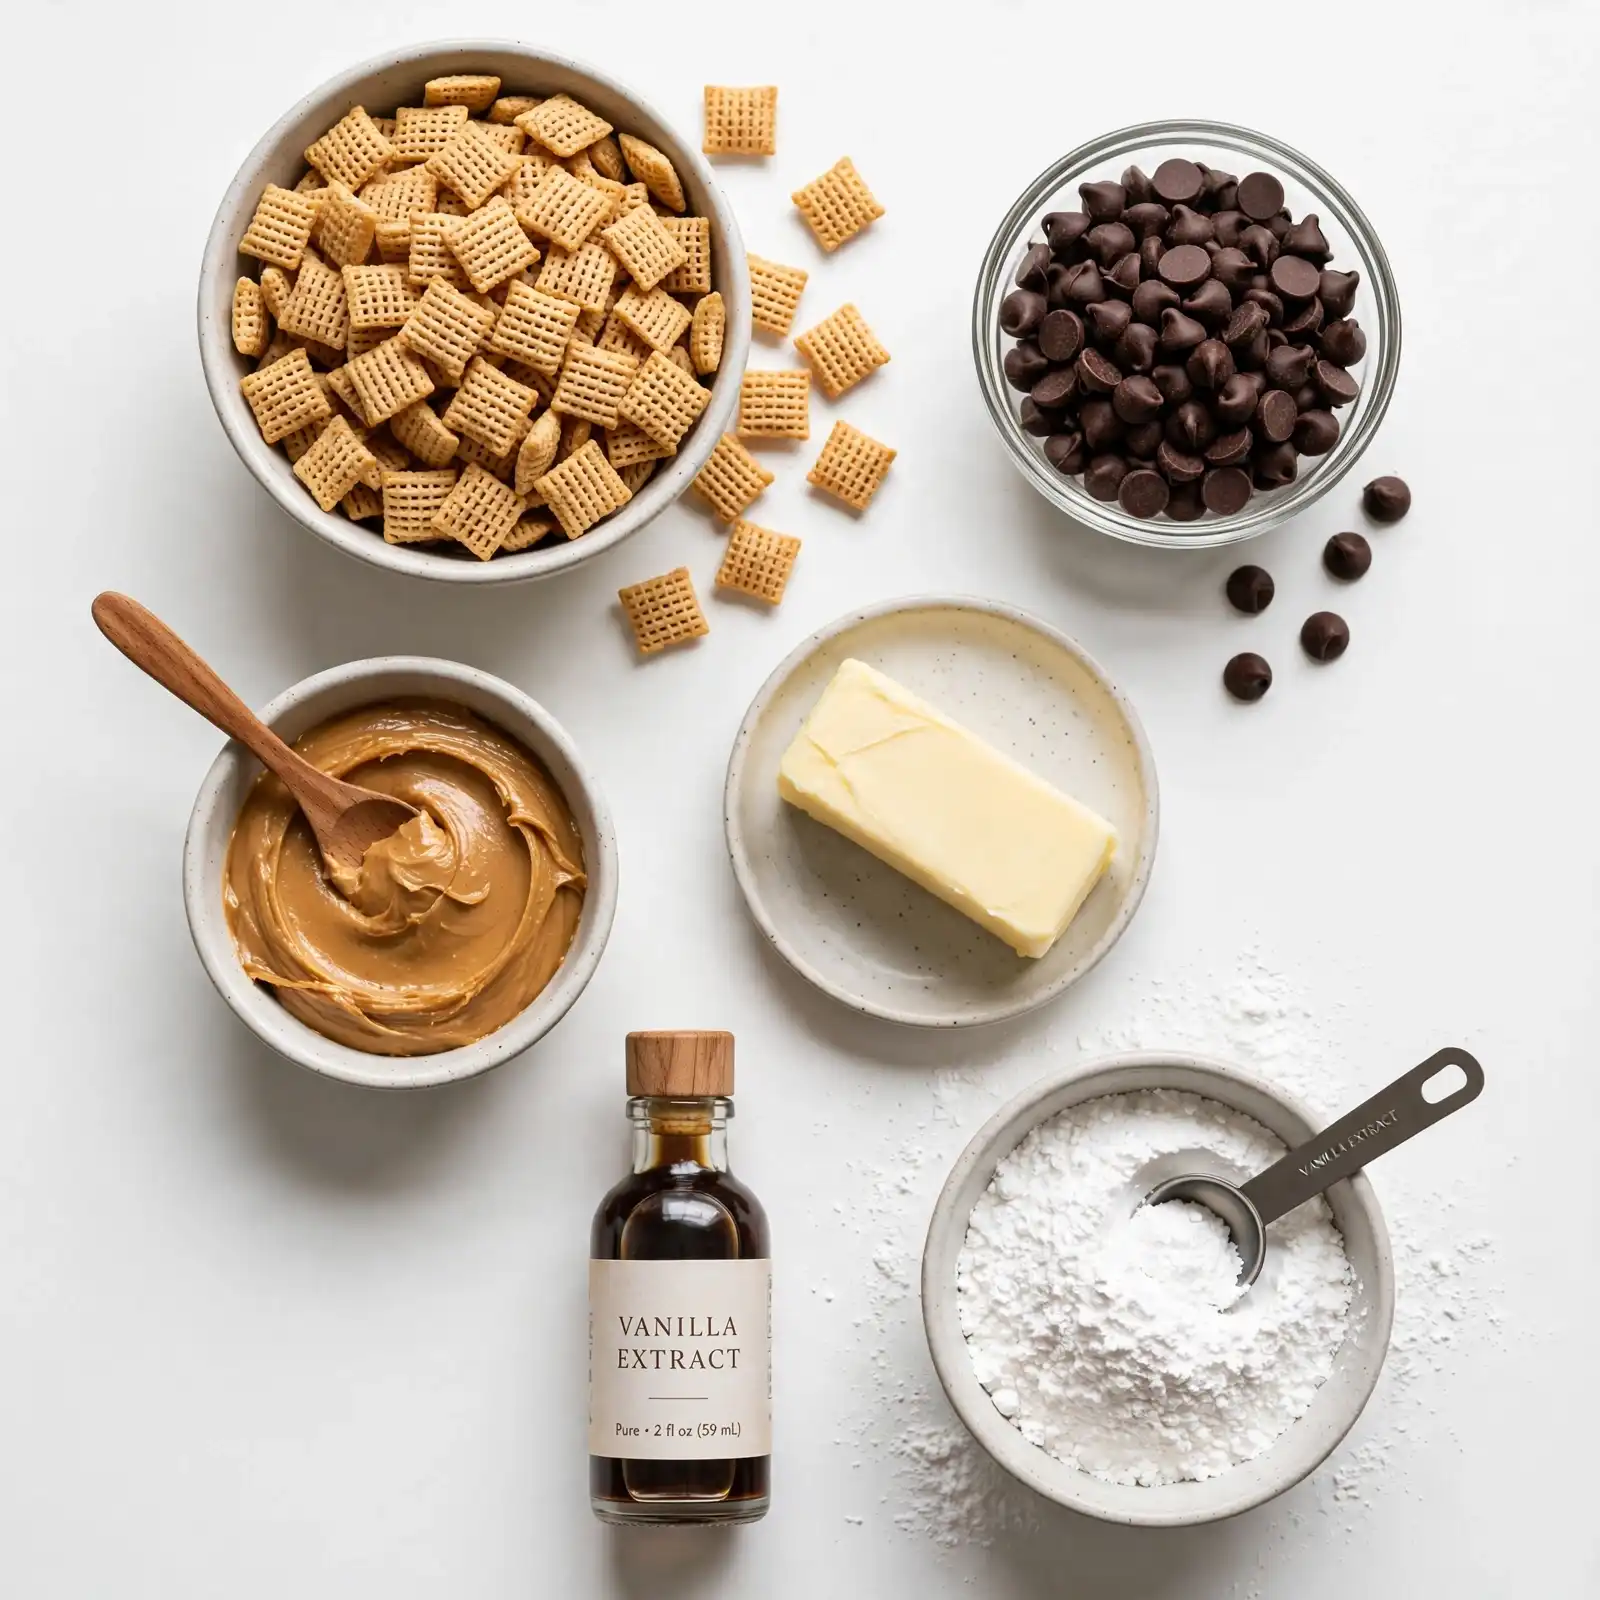
- 9 cups Rice Chex cereal (or Corn Chex — both work beautifully)
- 1 cup semi-sweet chocolate chips (good quality makes a noticeable difference)
- ½ cup creamy peanut butter (not natural — the separated kind makes it greasy)
- ¼ cup unsalted butter
- 1 tsp pure vanilla extract (not imitation)
- ¼ tsp fine sea salt
For the Coating
- 1½ cups powdered sugar (sifted to avoid any lumps)
The chocolate and peanut butter melt together into a glossy, fudgy sauce that clings perfectly to every crevice of the cereal, while the powdered sugar coating locks in the flavor and keeps each piece from sticking together. It’s a simple formula with a stunning payoff.
How to Make Puppy Chow — Step-by-Step
Step 1: Measure and Prep Your Cereal
Pour all 9 cups of cereal into the largest bowl you own — and if you’re tempted to use a medium bowl, grab a bigger one. You’ll need the room for tossing. Set it aside while you work on the coating. Don’t worry if a few pieces are broken; they’ll still taste just as good tucked into the mix.
Step 2: Melt the Chocolate, Peanut Butter, and Butter
Combine the chocolate chips, peanut butter, and butter in a microwave-safe bowl. Microwave in 30-second bursts, stirring well between each interval, until the mixture is completely smooth and glossy — usually 2 to 3 rounds total. Remove from the microwave, add the vanilla extract and sea salt, and stir one final time. The mixture should smell absolutely incredible at this point.
Step 3: Coat the Cereal
Pour the chocolate mixture directly over the cereal and use a large rubber spatula to fold everything together gently. Work your way around the bowl, lifting from the bottom and folding over the top, until every piece of cereal is evenly coated. Don’t worry if it looks a little clumpy at this stage — the next step takes care of that.
Step 4: Shake in the Powdered Sugar
Transfer the coated cereal into a large zip-top bag (a gallon-size works best) or a very large lidded container. Add the sifted powdered sugar, seal it tightly, and shake enthusiastically for about 30 to 45 seconds. Open the bag, peek inside, and give it another shake if any chocolate patches are still showing through. Every piece should come out looking snowy white. Don’t worry if there’s a little extra sugar in the bottom of the bag — that’s normal, and it means every piece got properly covered.
Step 5: Spread and Cool
Pour the finished Puppy Chow onto a large rimmed baking sheet lined with parchment paper and spread it into a single layer. Let it cool completely at room temperature for about 20 to 30 minutes, or speed things up by sliding the tray into the refrigerator for 10 minutes. Once the chocolate is fully set, the pieces will separate easily and that signature crunch will be at its best.
Perfecting This Recipe
- Use butter alongside the chocolate and peanut butter — it thins the coating just enough to spread smoothly without weighing the cereal down.
- Always stir the melted chocolate mixture between microwave intervals. Chocolate holds its shape even when melted, so it can scorch without looking burnt if you don’t check it.
- Sift your powdered sugar before adding it to the bag. Lumpy sugar sticks in clumps instead of coating evenly.
- Work quickly once the chocolate is melted — it will begin to thicken as it cools, and a thick sauce is harder to distribute evenly over all that cereal.
- Don’t skip the spreading step. Piling the finished mix in a bowl while still warm causes pieces to clump together as the chocolate sets.
- Let it cool completely before transferring to a serving bowl or storage container. Patience here means better texture every time.
Common Mistakes to Avoid
- Using natural peanut butter — The oil separation in natural varieties makes the coating greasy and prevents it from setting up cleanly. Stick with a conventional creamy peanut butter for the best result.
- Overheating the chocolate — Chocolate scorches quickly in the microwave. Thirty-second intervals with stirring in between is the only safe method; going longer “to save time” usually ends in a seized, grainy mess.
- Not using a large enough bowl — If your cereal is crowded, the coating won’t distribute evenly and you’ll end up with some pieces drowning in chocolate while others barely get touched.
- Skipping the cooling step — Cutting the cooling time short means the chocolate won’t set firmly, and you’ll end up with soft, sticky pieces instead of that satisfying crunch.
- Under-shaking the powdered sugar — A quick two-second shake won’t cut it. Shake until you genuinely can’t see any chocolate showing through on any piece — then shake a little more.
Add Your Touch
- Swap semi-sweet chocolate chips for dark chocolate or milk chocolate depending on how rich you want it.
- Use almond butter or sunflower seed butter instead of peanut butter for a nut-free variation that’s still deeply satisfying.
- Add ½ cup of mini M&Ms or festive holiday sprinkles after the cooling step for extra color and crunch.
- Toss in ½ cup of chopped roasted peanuts or pretzels for a salty contrast that makes it even harder to stop snacking.
- Drizzle cooled pieces with melted white chocolate for a cookies-and-cream effect that looks stunning in a gift tin.
- Try mixing in a pinch of cayenne or chili powder with the salt for a sweet-heat version that surprises every single person who tries it.
- Use a flavored peanut butter (like honey roasted) for a subtle twist that doesn’t overpower the chocolate.
Visit Also: Hashbrown Casserole
What to Serve With This
A tall glass of cold whole milk is the classic pairing — it cuts through the sweetness perfectly and makes the whole experience feel like childhood.
Hot cocoa or a creamy latte alongside a bowl of Puppy Chow turns snack time into something almost ceremonial on a cold afternoon.
Serve it next to a tray of brownies or chocolate chip cookies at a dessert table and watch guests pile their plates with both — chocolate fans will be in their element.
A sparkling lemonade or cranberry punch provides a tart, fizzy contrast that refreshes your palate between handfuls.
For a party snack spread, set it out beside salted caramel popcorn and a charcuterie board for the full sweet-and-savory range.
Storing and Serving
Fridge: Store in an airtight container or zip-top bag in the refrigerator for up to one week. The cold actually keeps the coating crisp and the chocolate firm.
Freezer: Puppy Chow freezes surprisingly well. Seal in a freezer-safe bag, press out all the air, and freeze for up to six weeks. Thaw at room temperature for about 20 minutes before serving — texture holds up beautifully.
Reheating: No reheating needed or recommended. This is a cold or room-temperature snack by design, and warming it softens the coating.
Make-Ahead Tip: This recipe can be made up to three days in advance and stored in an airtight container at room temperature. It actually benefits from sitting overnight — the flavors meld and the coating firms up even more. Make it the day before a party and you’ll be glad you did.
Servings: This recipe yields approximately 12 generous servings or 16 smaller snack-sized portions.
Nutrition (Approximate Per Serving)
- Calories: 285
- Total Fat: 12g
- Saturated Fat: 5g
- Carbohydrates: 41g
- Sugar: 26g
- Protein: 4g
- Sodium: 160mg
Nutritional values are approximate and may vary based on specific ingredients and brands used.
Chef’s Helpful Tips
- Bring your butter to room temperature before melting — it blends more smoothly with the chocolate and peanut butter and results in a silkier, more even coating.
- If your powdered sugar seems particularly lumpy, sift it right into the zip-top bag before adding the cereal. One less bowl to wash, one smoother result.
- For clean, gift-worthy presentation, use a slotted spoon to scoop finished Puppy Chow into bags or tins — it separates pieces naturally and leaves the excess sugar behind.
- Use the best chocolate chips you can find. The chocolate is the star of this recipe, and a higher cocoa content gives the coating a depth and richness that bargain chips just can’t match.
- If your finished batch seems wet or the coating isn’t setting, add an extra ¼ cup of powdered sugar and give it another shake. A slightly more generous dusting almost always solves it.
Frequently Asked Questions
Q1. Can I use a different cereal? Absolutely — Corn Chex and Rice Chex are both classic choices and work equally well. Some people love using a mix of both. Avoid anything with a strong competing flavor (like frosted or cinnamon varieties), which can throw off the chocolate-peanut butter balance.
Q2. Does this taste like a Reese’s cup? Very much so, especially if you use milk chocolate chips instead of semi-sweet. The peanut butter and chocolate ratio is similar, just spread across crunchy, airy cereal instead of a dense cup — so it’s actually a little lighter and more snackable than the candy.
Q3. Is this beginner-friendly? This is genuinely one of the most forgiving recipes out there. If you can melt chocolate without burning it and seal a zip-top bag, you can make this successfully on your very first attempt. There’s nothing to bake, no temperatures to worry about, and the shaking step is honestly a little fun.
Q4. Can I make this ahead for a party or potluck? It’s one of the best make-ahead party snacks there is. Make it up to three days in advance, store it in a sealed bag or tin, and it’ll be just as crisp and delicious when you serve it. In fact, making it the night before is the recommended approach — it gives the coating time to fully set.
Q5. Can I freeze Puppy Chow? Yes, and it freezes better than you’d expect. Pack it in a freezer-safe zip-top bag with the air pressed out and it keeps well for up to six weeks. Thaw at room temperature for about 20 minutes and it comes right back to its original crunchy, powdery self with no noticeable change in flavor or texture.
Conclusion
There’s a reason Puppy Chow has earned its place as one of those recipes that gets requested again and again — at holiday parties, after-school snack sessions, road trips, cookie swaps, and every kind of gathering in between. It’s humble in its ingredients and effortless in its process, and yet the result is something people genuinely can’t stop eating. It works because it doesn’t try to be anything other than what it is: a joyful, crunchy, chocolatey, outrageously satisfying handful of happy.
So go ahead and make a batch — or double it, because one batch never lasts long enough. Shake it up, spread it out, let it cool, and then bring it somewhere you love or simply eat it by the handful on your couch. Either way, you win. And if you make it your own with a little twist or a personal spin, I’d love to hear about it. That’s the best part about a recipe like this — it belongs to whoever makes it next.
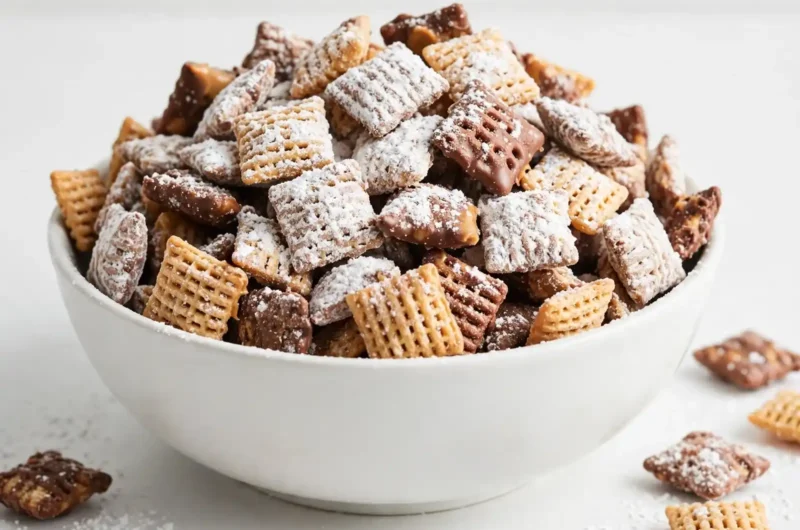
Classic Puppy Chow
Course: Trending Recipes12–16
servings10
minutes5
minutes285 per serving
kcal20
minutes35
minutesLight, crunchy Rice Chex coated in a silky chocolate-peanut butter shell and dusted in a blizzard of powdered sugar. Ready in under 20 minutes with no oven required — the ultimate easy party snack mix.
Ingredients
For the Base:
9 cups Rice Chex cereal
1 cup semi-sweet chocolate chips
½ cup creamy peanut butter
¼ cup unsalted butter
1 tsp pure vanilla extract
¼ tsp fine sea salt
For the Coating:
1½ cups powdered sugar, sifted
Directions
- Pour cereal into a very large mixing bowl and set aside.
- Combine chocolate chips, peanut butter, and butter in a microwave-safe bowl. Microwave in 30-second intervals, stirring between each, until smooth. Stir in vanilla and salt.
- Pour chocolate mixture over cereal and fold gently with a rubber spatula until all pieces are evenly coated.
- Transfer coated cereal to a large zip-top bag. Add sifted powdered sugar, seal, and shake for 30–45 seconds until all pieces are white and no chocolate shows through.
- Spread onto a parchment-lined baking sheet in a single layer and cool for 20–30 minutes until fully set. Transfer to a serving bowl or airtight container.