Crispy Baked Chicken Tacos Your Whole Family Will Devour
The first time I made these, it was a Thursday — one of those evenings where the fridge was half-empty and everyone was already asking “what’s for dinner” before I’d even set my bag down. I grabbed a rotisserie chicken, a can of diced tomatoes, a stack of corn tortillas, and just decided to throw something together. What came out of that oven forty minutes later genuinely surprised me. Crispy shells, juicy seasoned filling, melted cheese bubbling at the edges — it was a weeknight miracle in a baking dish.
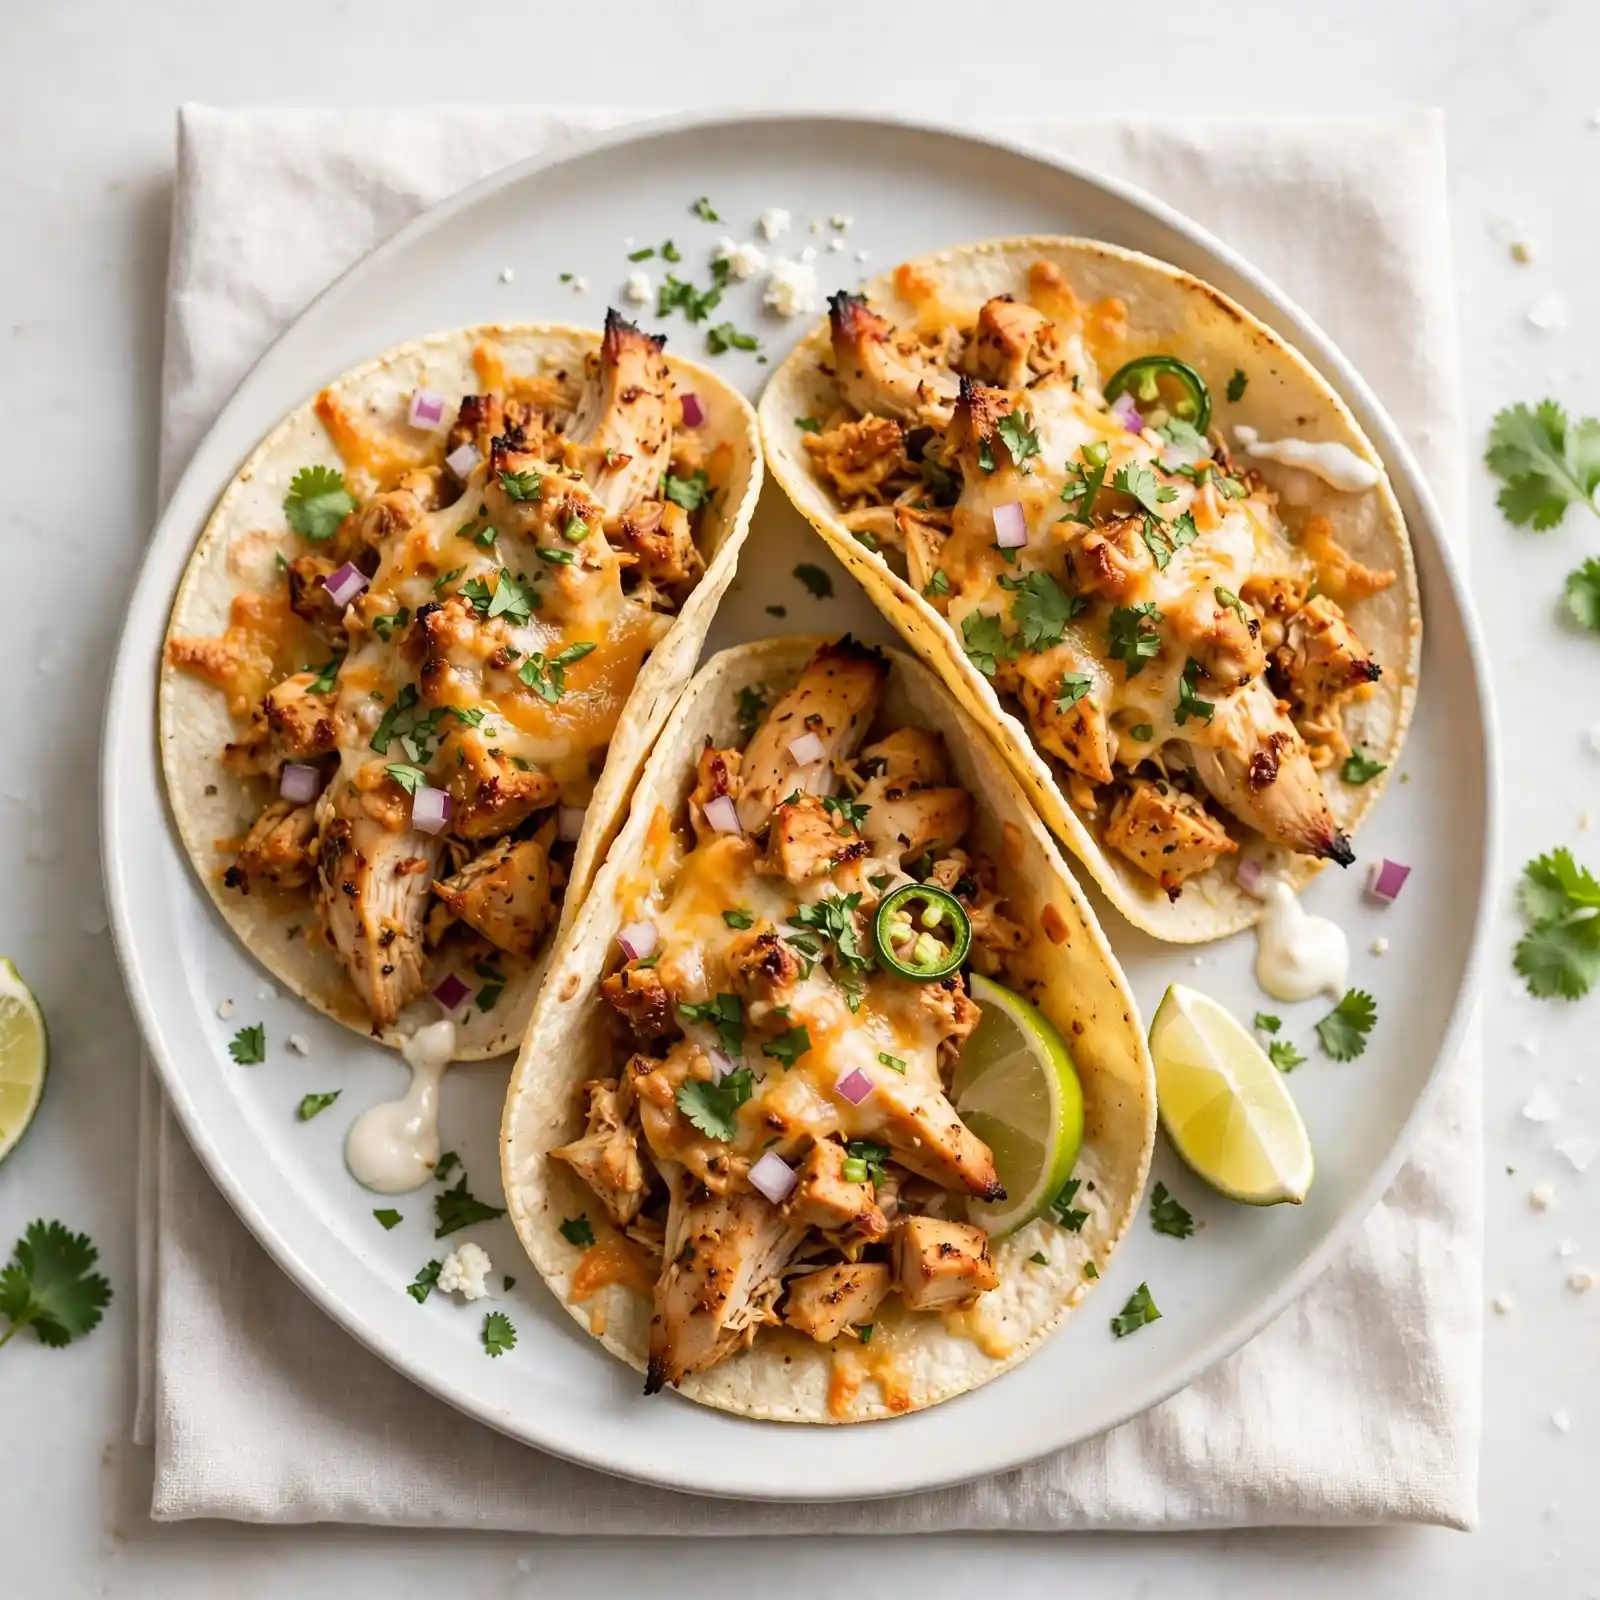
The texture alone will win you over. The shells go perfectly golden and crispy in the oven without any frying, while the inside stays tender, saucy, and warm. The chicken soaks up a blend of smoky spices, the cheese melts right into every crevice, and the whole thing smells like something you’d order at your favorite neighborhood taco spot — that warm, cumin-laced, slightly charred aroma that makes everyone wander into the kitchen.
These baked chicken tacos were made for sharing. They’re just as perfect for a casual weeknight dinner as they are for a game-day spread, Taco Tuesday with friends, or even a laid-back holiday gathering. Because they bake all at once in a single dish, they’re genuinely fuss-free — and they feed a crowd without any last-minute scrambling. If you’ve been hunting for easy chicken tacos that actually deliver on flavor, you’ve found them.
Why You’ll Love This Recipe
They Come Out Perfectly Crispy Every Time
The secret is standing the filled shells upright in a baking dish so both sides get even oven heat. No flipping, no frying, no babysitting — just beautifully golden, crunchy shells every single time.
The Filling Is Bold, Juicy, and Deeply Flavored
A combination of chili powder, cumin, garlic, and a splash of salsa transforms plain shredded chicken into something genuinely crave-worthy. The filling stays juicy inside the shell while the outside gets that satisfying crisp.
It’s One of the Easiest Dinners You Can Make
If you’re using a rotisserie chicken, dinner is mostly assembly. Everything bakes together in one dish, which means minimal prep and even less cleanup — a genuine win on a busy night.
Perfect for Feeding a Group All at Once
Unlike stovetop tacos where you’re standing at the stove making one at a time, these bake twelve at once. Set them in the dish, slide them in the oven, and walk away. Crowd-pleasing without the chaos.
Customizable Enough for Every Taste at the Table
The base recipe is a hit on its own, but it’s also a blank canvas. Spice lovers can add jalapeño, picky eaters can keep theirs plain, and cheese enthusiasts can load theirs up — no one goes hungry and everyone gets exactly what they want.
Ingredients
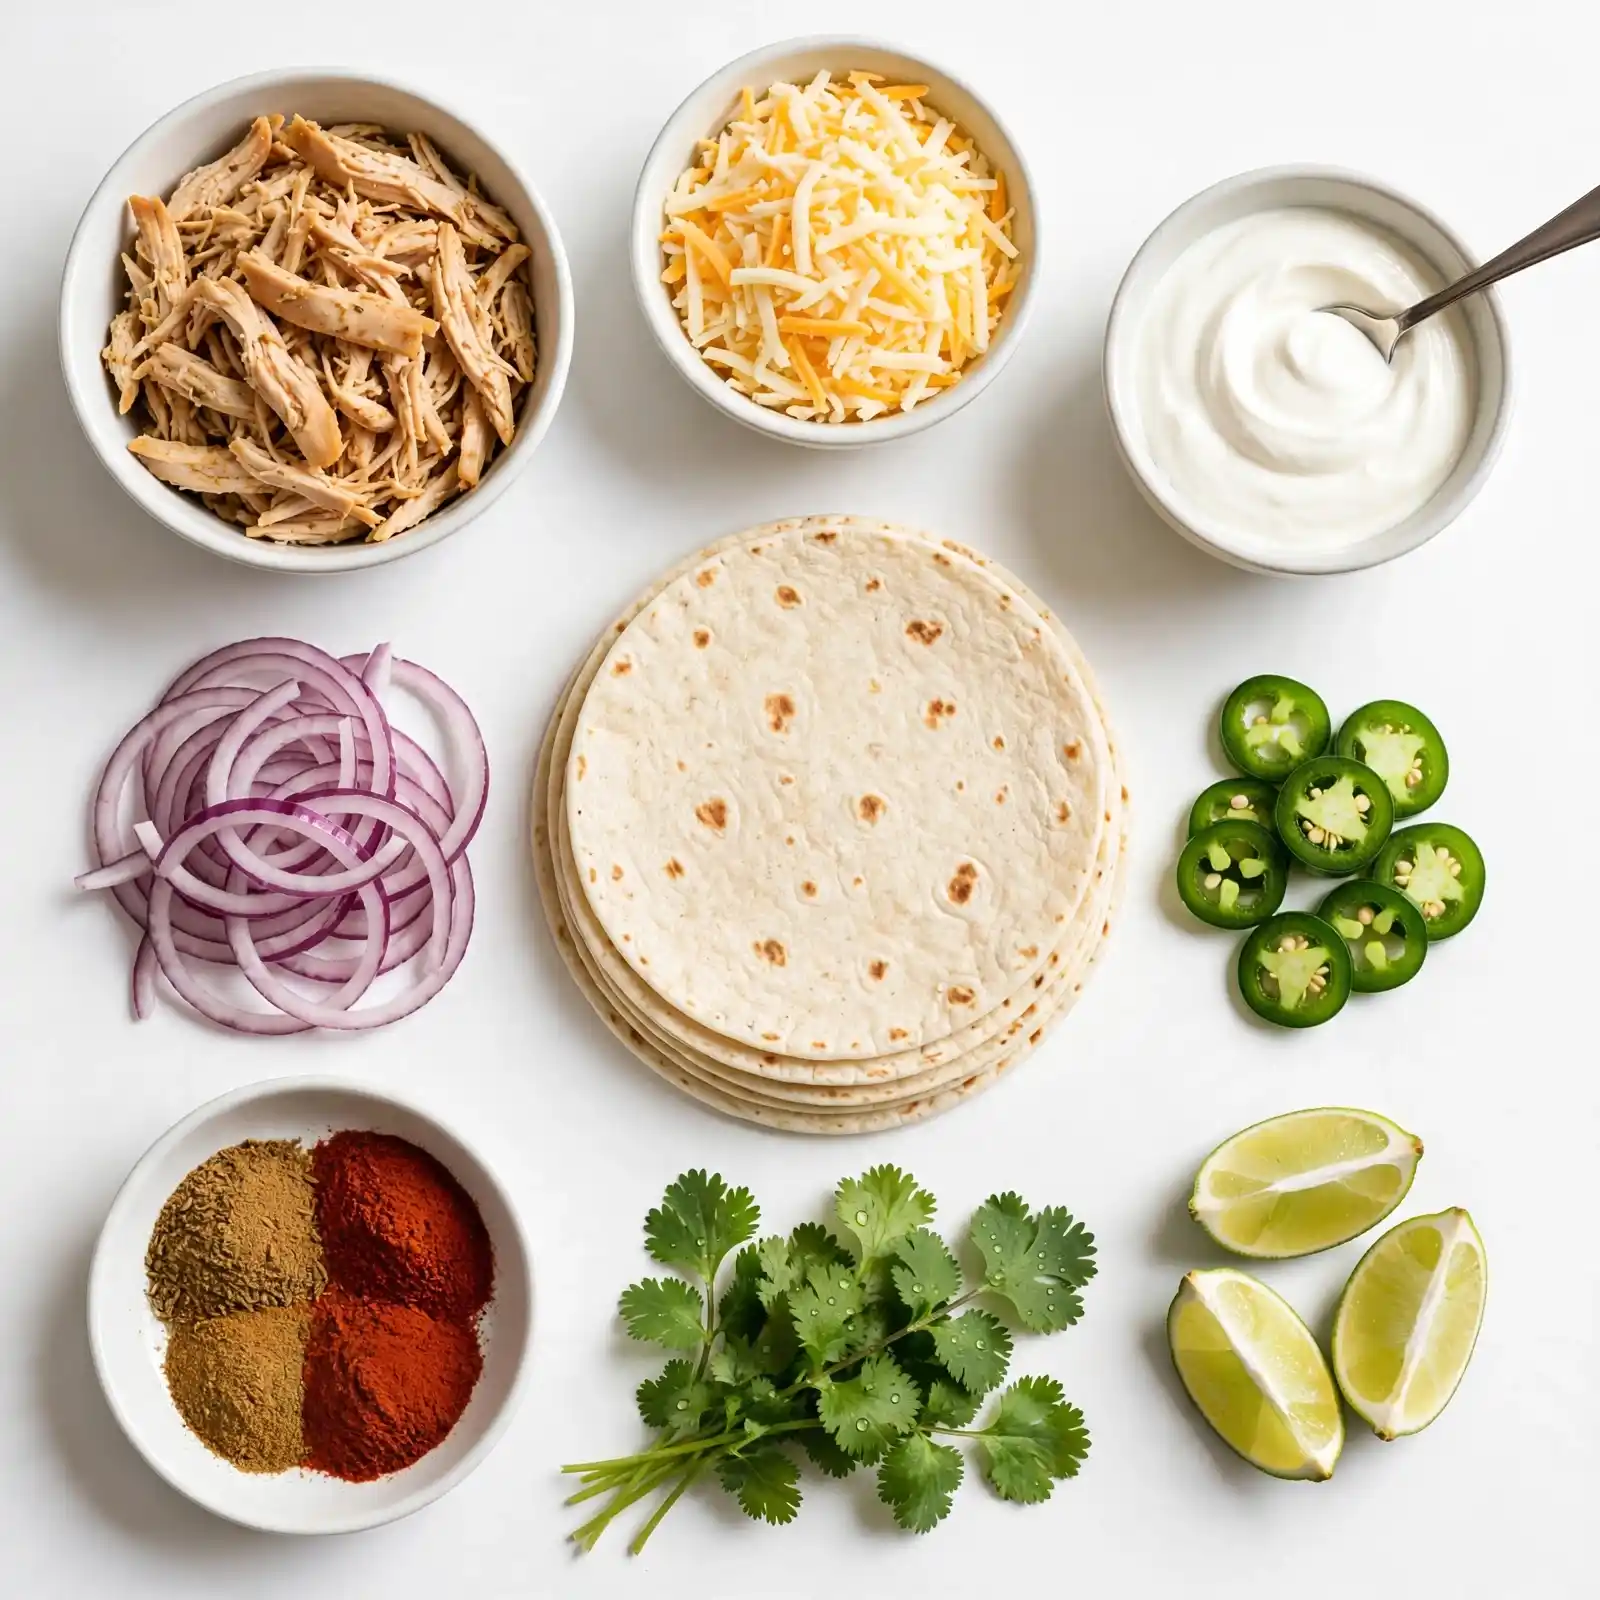
For the Chicken Filling
- 3 cups shredded cooked chicken (rotisserie works beautifully here)
- 1 cup chunky salsa (medium heat recommended, or mild for sensitive palates)
- 1 tsp chili powder
- 1 tsp ground cumin
- ½ tsp garlic powder
- ½ tsp onion powder
- ½ tsp smoked paprika
- ¼ tsp fine sea salt (adjust to taste)
- ¼ tsp black pepper
For the Taco Assembly
- 12 small corn tortillas (6-inch; yellow or white both work)
- 1½ cups shredded Mexican cheese blend (or a mix of cheddar and Monterey Jack)
- 2 tbsp olive oil or cooking spray (for brushing the tortillas)
For the Toppings (Serve Alongside)
- 1 cup sour cream
- 1 cup pico de gallo or fresh salsa
- 1 cup shredded lettuce (iceberg or romaine)
- 1 medium avocado, sliced (or a scoop of guacamole)
- Fresh cilantro and lime wedges, to finish
The magic here is in the contrast: the warm, smoky filling against the cool, creamy toppings. Every element plays a role — the salsa keeps the chicken moist, the cheese binds it all, and the crunchy shell gives it structure and that satisfying bite.
How to Make Baked Chicken Tacos — Step-by-Step
Step 1: Preheat Your Oven and Prep the Pan
Preheat your oven to 425°F (220°C). Lightly grease a 9×13-inch baking dish with cooking spray or a thin coating of olive oil. This setup creates the heat environment that crisps the shells beautifully without drying out the filling.
Step 2: Mix the Chicken Filling
In a medium bowl, combine the shredded chicken, salsa, chili powder, cumin, garlic powder, onion powder, smoked paprika, salt, and pepper. Stir until the chicken is evenly coated. The mixture should look saucy and smell wonderfully smoky — if it seems a little dry, add an extra tablespoon of salsa. Don’t worry if the filling looks a bit loose at this stage; it firms up perfectly in the oven.
Step 3: Warm and Soften the Tortillas
Stack your corn tortillas, wrap them in a damp paper towel, and microwave for 30–45 seconds until soft and pliable. This step is non-negotiable — cold tortillas crack when you fold them. Brush each tortilla lightly with olive oil on both sides; this is what makes them go golden and crispy in the oven.
Step 4: Fill and Stand the Tacos Upright
Spoon about 3 tablespoons of the chicken mixture down the center of each tortilla. Fold it in half and stand it upright in the prepared baking dish. Nestle them tightly together so they hold each other in place — they should fit snugly like a row of little books on a shelf. Don’t worry if a few look a bit wobbly; once they’re packed in together, they’ll stay put.
Step 5: Add the Cheese and Bake
Sprinkle the shredded cheese generously over the top of each taco, letting it fall into the fold. Slide the dish into the oven and bake for 15–18 minutes, until the shells are golden and crispy, the cheese is fully melted and slightly bronzed at the edges, and the whole kitchen smells incredible. Let them rest in the pan for 3–5 minutes before serving — this helps the shells stay crispy even after you plate them.
Perfecting This Recipe
- Warm the tortillas every time. Skipping this step is the number one reason tortillas crack. A damp paper towel in the microwave takes less than a minute and makes all the difference.
- Pack the tacos tightly in the dish. The more snugly they’re nestled together, the better they hold their shape during baking. A loose arrangement means fallen tacos and a messy pan.
- Don’t overfill. Three tablespoons of filling per taco is the sweet spot. Too much and the taco won’t stay folded; too little and the shell-to-filling ratio is off.
- Use the right cheese. Pre-shredded Mexican blends melt beautifully here. Avoid fresh mozzarella — it releases too much moisture and makes the shells soggy.
- Let them rest before serving. Five minutes out of the oven allows the shells to set into that satisfying crunch. Rushing straight to the table means soft tacos.
- Bake uncovered. A foil tent will steam the shells and rob them of their crispiness. Keep the dish open and let the oven do its work.
Common Mistakes to Avoid
- Using cold, unwarmed tortillas — Corn tortillas fresh from the package will crack the moment you try to fold them. Always warm them first until they’re soft and bendable.
- Skimping on the oil — Brushing the outside of each tortilla with olive oil is what gives them that golden, crispy shell. Without it, they bake up dry and pale rather than satisfyingly crunchy.
- Overstuffing the tacos — It’s tempting to pile in more filling, but an overfilled taco won’t stay folded and the shells will splay open in the oven. Three tablespoons per taco is the right amount.
- Using watery salsa — Very thin, liquid-heavy salsas can make the filling soupy and prevent the shells from crisping properly. A chunky salsa or one that’s been briefly drained gives much better results.
- Pulling them out too early — The cheese should be fully melted and lightly golden, not just barely bubbling. Give them the full 15–18 minutes for the best texture throughout.
Add Your Touch
- Stir in a chipotle pepper in adobo sauce for a smoky, spicy kick that takes the filling to another level.
- Swap the chicken for black beans and corn for an easy, satisfying vegetarian version.
- Use flour tortillas if you prefer a softer shell — they won’t get quite as crispy, but they’re sturdier and hold more filling.
- Add a layer of refried beans inside each taco before the chicken for extra heartiness and creaminess.
- Try pepper jack cheese instead of the Mexican blend for a spicier, melty finish.
- Make it breakfast-ready by swapping the salsa chicken for scrambled eggs, chorizo, and a little hot sauce.
Visit Also: Ground Beef Stir Fry
What to Serve With This
- Mexican rice — A simple cilantro-lime rice on the side turns this into a full, satisfying meal.
- Refried beans — Creamy, seasoned beans are the perfect scoop alongside a crispy taco.
- Street corn salad (elotes) — The sweet, charred corn and creamy lime dressing balance the smoky filling perfectly.
- Fresh margaritas or agua fresca — A citrusy drink cuts through the richness of the cheese and makes everything feel like a celebration.
- A simple green salad — A handful of arugula with lime vinaigrette keeps things light and fresh if you want balance on the plate.
Storing and Serving
Fridge: Store leftover assembled tacos in an airtight container for up to 3 days. Keep toppings separate to prevent the shells from softening.
Freezer: The chicken filling freezes beautifully for up to 2 months. Store it in a zip-lock bag or freezer-safe container. Thaw overnight in the fridge, reheat, and assemble fresh tacos when ready to serve. Avoid freezing assembled baked tacos — the shells won’t recover their texture.
Reheating: Reheat assembled tacos in the oven at 375°F for 8–10 minutes, or in an air fryer at 350°F for 4–5 minutes. The microwave works in a pinch but will soften the shells.
Make-Ahead Tip: The chicken filling can be made up to 2 days ahead and stored in the fridge. Assemble and bake the tacos fresh for best results — the whole process takes less than 25 minutes once the filling is ready.
Servings: This recipe makes 12 tacos, serving approximately 4–6 people depending on appetite.
Nutrition (Approximate Per Serving — 2 Tacos)
- Calories: 385
- Total Fat: 17g
- Saturated Fat: 7g
- Carbohydrates: 30g
- Sugar: 3g
- Protein: 28g
- Sodium: 620mg
Nutritional values are approximate and may vary based on specific ingredients and brands used.
Chef’s Helpful Tips
- Room temperature chicken blends better. If you’re shredding a cold rotisserie chicken straight from the fridge, give it 10 minutes on the counter first. Cold chicken doesn’t absorb the seasoning as well and can make the filling feel dense.
- Use a pastry brush for the oil. It gives you even, controlled coverage on every tortilla — much more efficient than trying to spray each one individually.
- Check at the 15-minute mark. Every oven runs slightly differently. If the cheese is deeply golden and the shells are visibly crispy, they’re done. Overbaking even by 5 minutes can dry out the filling.
- Slice a lime over the tacos fresh out of the oven. The hit of citrus right before serving brightens all the smoky, savory flavors in a way that makes a real difference.
- For clean serving, use tongs. The tacos slide around on the pan easily when you’re plating. A pair of tongs gives you control and keeps the shells from breaking when you lift them.
Frequently Asked Questions
Q1. Can I use flour tortillas instead of corn? Absolutely — flour tortillas work well and give a slightly softer, chewier result rather than a crispy shell. They’re also a bit more forgiving if you’re working quickly and the tortillas aren’t perfectly warmed. Just brush them with oil the same way and keep the same baking time.
Q2. How is this different from regular stovetop tacos? The oven does something special here — it crisps the outside of the shell while keeping the filling warm and juicy inside, almost like a baked quesadilla and a taco had a very delicious baby. You get way more texture and structure than a soft taco, without the mess of frying.
Q3. Is this recipe beginner-friendly? It really is — if you can stir ingredients in a bowl and fold a tortilla, you can make these. The oven-baked tacos are actually much more forgiving than stovetop cooking because everything goes in at once and bakes evenly without you having to watch it every second.
Q4. Can I make these ahead for a party? Yes! Prep the filling up to two days ahead and refrigerate it. On the day of the party, assemble the tacos and slide them in the oven about 20 minutes before guests arrive — they’ll come out hot and perfectly crispy right when you need them.
Q5. Can I freeze these baked chicken tacos? Freeze the filling, not the assembled tacos. The chicken filling freezes perfectly for up to two months. When you’re ready for tacos again, thaw overnight, reheat, and assemble fresh — the texture is just as good as day one.
Conclusion
There’s a reason these baked chicken tacos have become a weekly staple in so many homes — they’re the kind of recipe that’s greater than the sum of its parts. A handful of pantry staples, twenty minutes of hands-on time, and one baking dish come together into something genuinely impressive: crispy, cheesy, smoky, satisfying, and endlessly riffable. Whether it’s a Tuesday night scramble or a weekend gathering with people you love, this recipe handles it all with ease.
So preheat that oven, warm up those tortillas, and make them your own. Pile on the toppings, squeeze a little lime, and enjoy the moment when everyone reaches for seconds before you’ve even sat down. That’s the best part of a great recipe — not just the eating, but the togetherness it quietly creates.
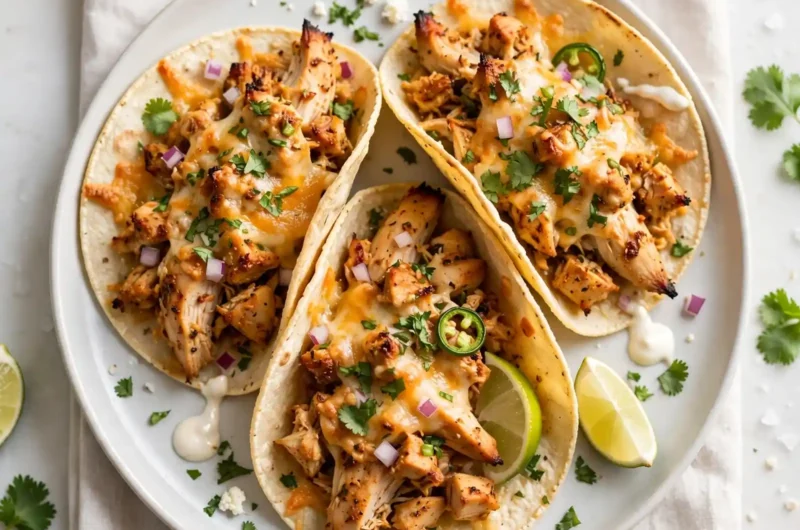
Crispy Baked Chicken Tacos
Course: Trending Recipes12 tacos (4–6 people)
servings15
minutes15
minutes385 per serving (2 tacos)
kcal30
minutesA quick, flavor-packed weeknight dinner with juicy seasoned chicken, melty cheese, and perfectly crispy shells — all baked at once in a single dish. Great for family dinners, taco nights, and feeding a crowd without the chaos.
Ingredients
Chicken Filling:
3 cups shredded cooked chicken
1 cup chunky salsa
1 tsp chili powder
1 tsp ground cumin
½ tsp garlic powder
½ tsp onion powder
½ tsp smoked paprika
¼ tsp fine sea salt
¼ tsp black pepper
Taco Assembly:
12 small corn tortillas (6-inch)
1½ cups shredded Mexican cheese blend
2 tbsp olive oil or cooking spray
Toppings (Serve Alongside):
1 cup sour cream
1 cup pico de gallo
1 cup shredded lettuce
1 avocado, sliced
Fresh cilantro and lime wedges
Directions
- Preheat oven to 425°F (220°C). Grease a 9×13-inch baking dish.
- Combine chicken, salsa, and all spices in a bowl. Stir until evenly coated.
- Wrap tortillas in a damp paper towel and microwave 30–45 seconds until pliable. Brush both sides lightly with olive oil.
- Spoon about 3 tbsp of filling into each tortilla. Fold and stand upright in the baking dish, packed snugly.
- Sprinkle cheese over the tops of all tacos.
- Bake uncovered for 15–18 minutes until shells are golden and cheese is melted.
- Rest 3–5 minutes before serving. Top with sour cream, pico de gallo, lettuce, and avocado.