Sticky, Golden Honey Glazed Chicken the Whole Family Will Crave
My grandmother used to pull a pan of gleaming, lacquered chicken from the oven every Sunday, and the smell alone would bring everyone running to the kitchen before she even called us to the table. That deep, caramel-sweet aroma — warm with garlic, rich with butter — is the kind of thing that gets permanently wired into your memory. This recipe brings that exact feeling back, every single time.
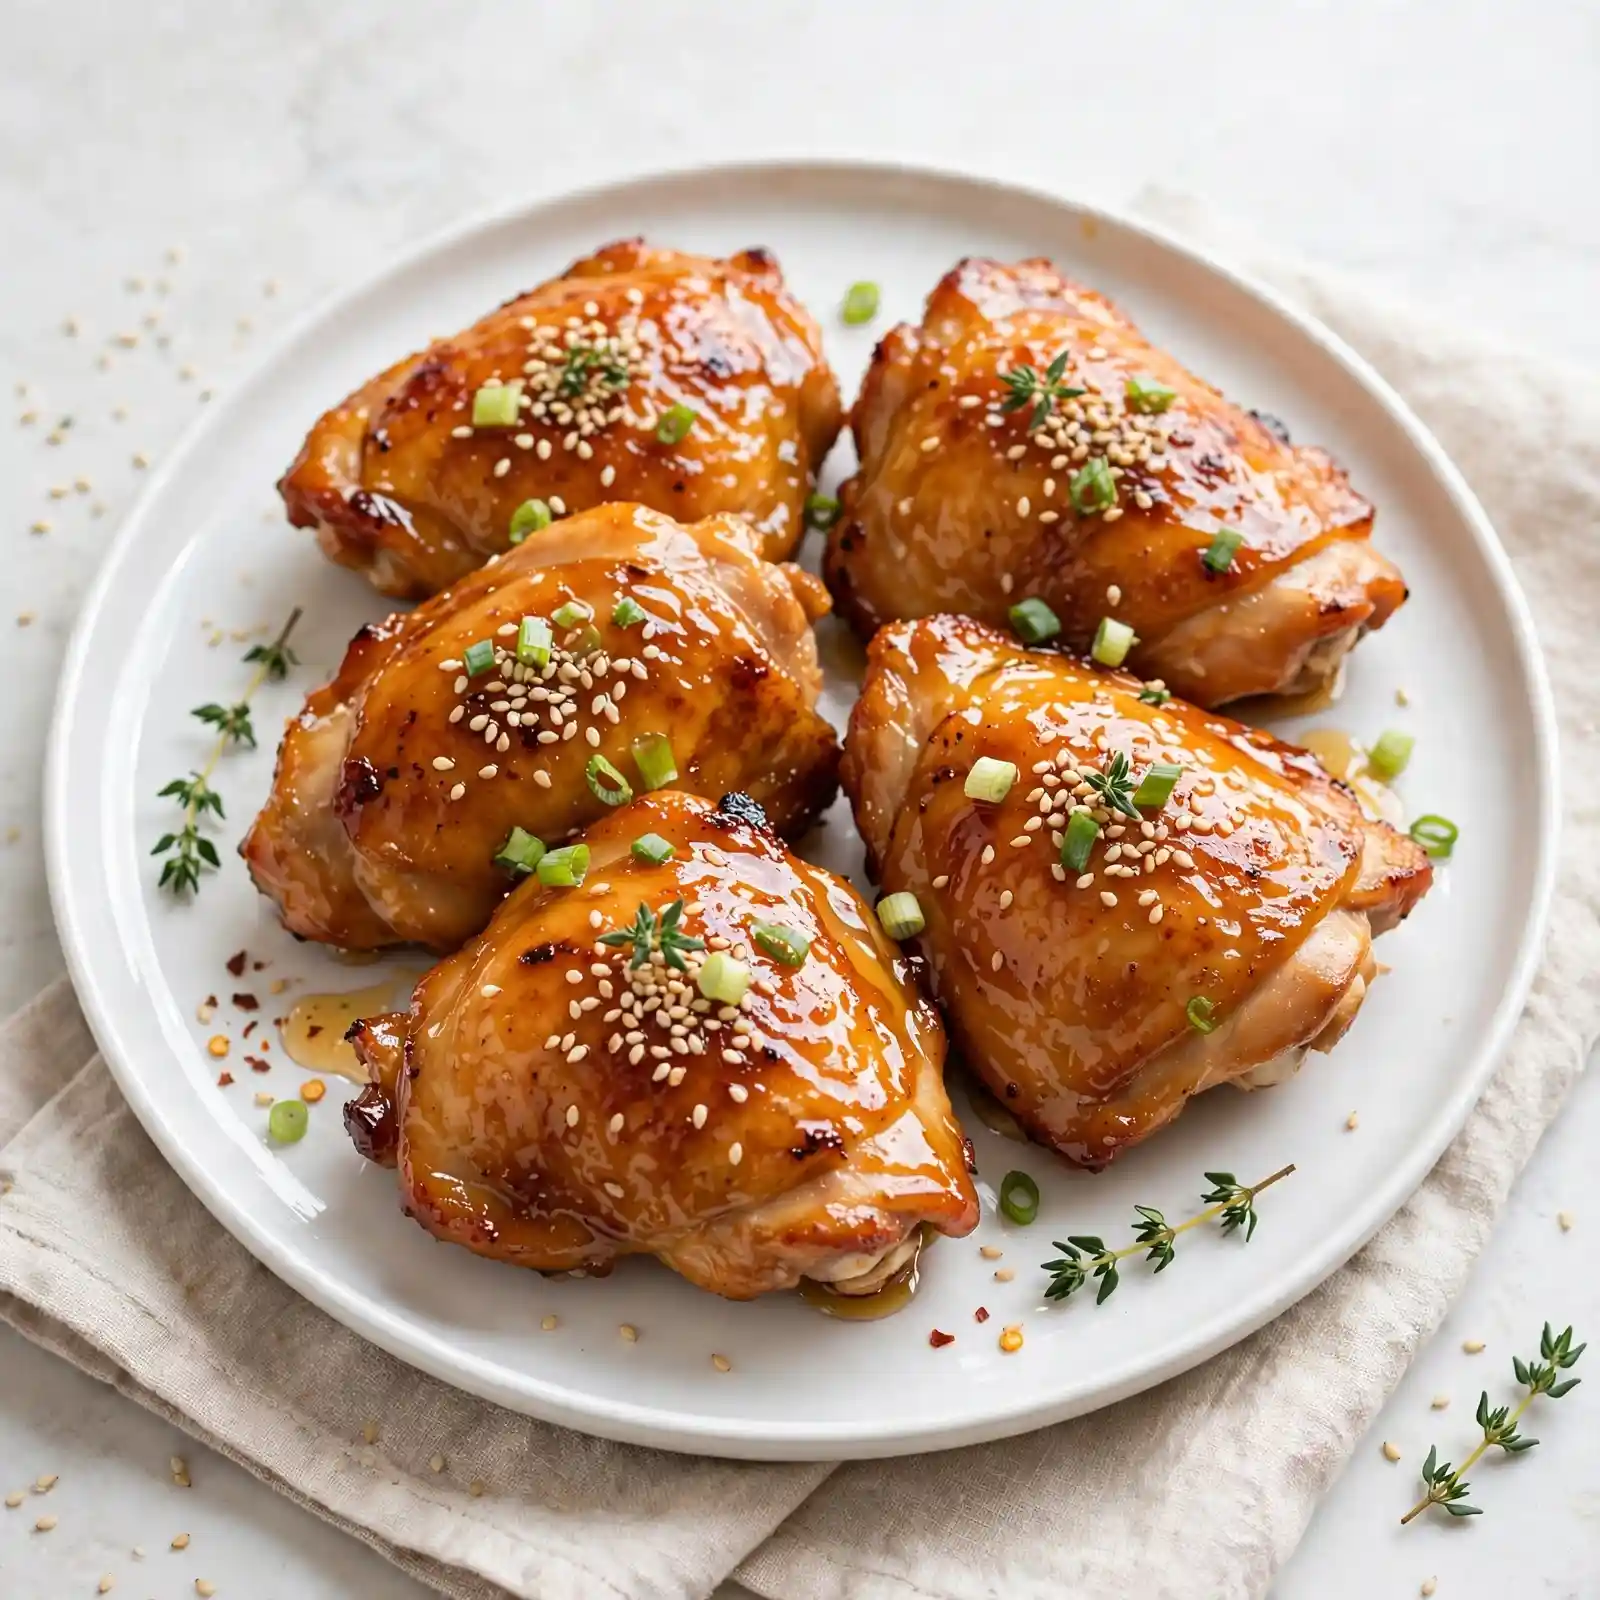
The chicken comes out with burnished, mahogany-colored skin that crackles softly when you cut through it, giving way to meat that is impossibly juicy underneath. The glaze is thick, sticky, and glossy — sweet from the honey, savory from the soy, with just enough garlic and ginger to keep it from being one-note. Every bite coats your lips in the best possible way.
Whether you’re pulling this together on a busy weeknight or setting it out at a family gathering, it fits right in. It pairs beautifully alongside roasted vegetables, fluffy rice, or a crisp salad — making it one of those easy weeknight dinner ideas that never feels like a compromise. If you’ve been looking for a reliable, crowd-pleasing sticky chicken recipe, this is the one you’ll bookmark and actually return to.
Why You’ll Love This Recipe
The Flavor Is Deeply Satisfying
The honey glaze strikes a perfect balance between sweet and savory. The soy sauce adds depth, the garlic brings warmth, and a touch of apple cider vinegar cuts through the richness so it never becomes cloying. It’s layered, complex flavor with extremely simple ingredients.
The Texture Is Everything
You get crispy, caramelized edges on the outside and tender, pull-apart meat on the inside. That contrast — sticky skin against juicy flesh — is exactly what makes this dish so hard to stop eating.
It’s Genuinely Easy to Make
No fancy techniques, no hard-to-find ingredients, and no babysitting required. You mix the glaze, coat the chicken, and let the oven do the heavy lifting. Even a first-time cook can nail this on the first try.
Perfect for Any Occasion
This dish moves effortlessly from a Tuesday dinner to a holiday spread. It looks impressive enough for guests and comes together quickly enough for weeknights — a rare combination that earns it a permanent spot in your rotation.
A Classic Made Even Better
Honey chicken isn’t new, but this version earns its place by layering flavors in a way that goes beyond the basic. Fresh ginger, a splash of sesame oil, and a finishing glaze applied in two stages make it noticeably more complex than anything you’d get from a bottle.
Ingredients
For the Chicken
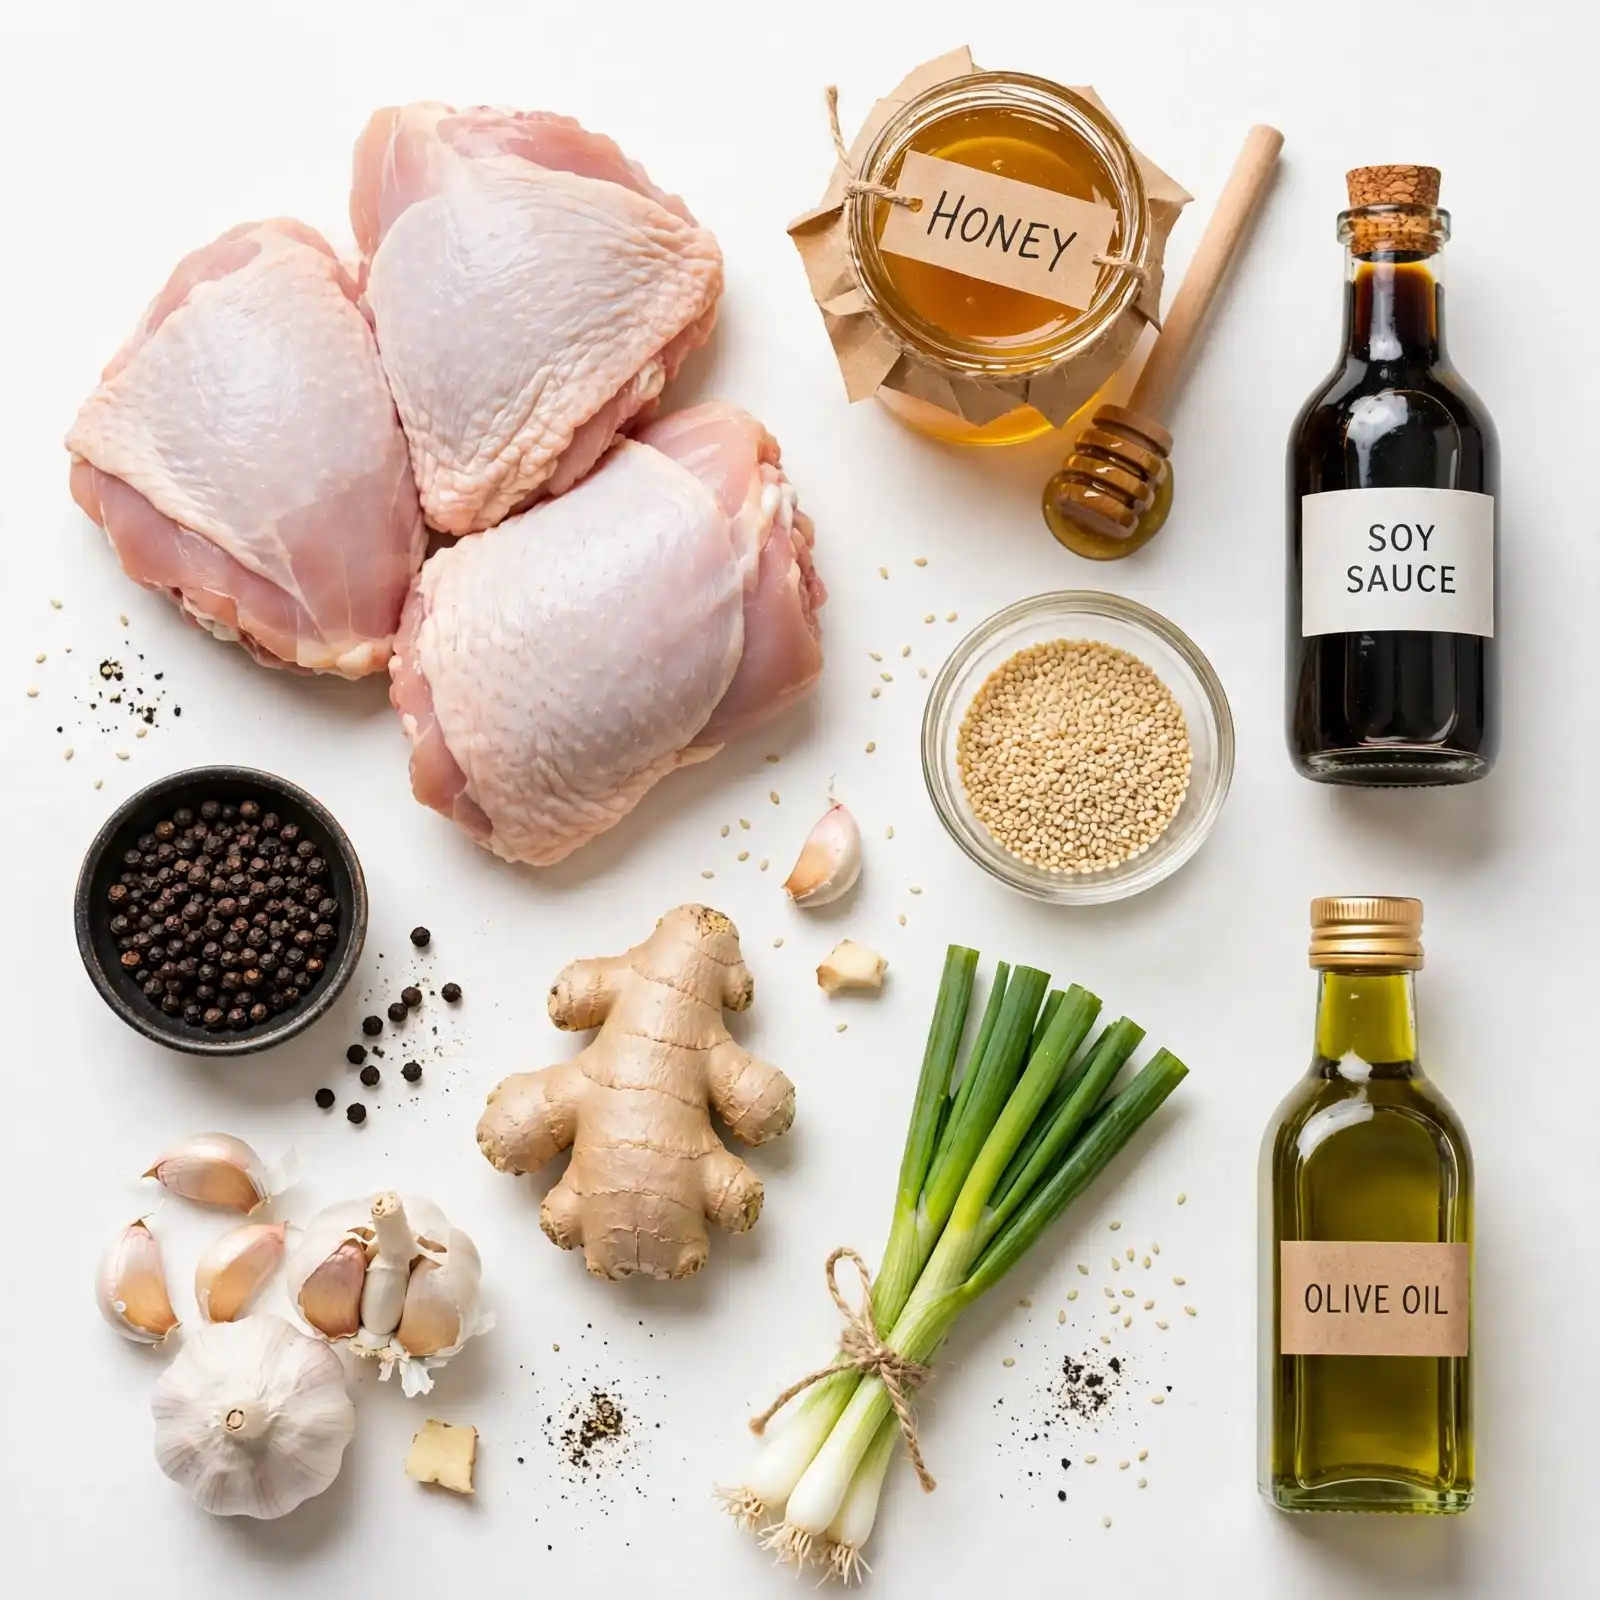
- 2.5 lbs bone-in, skin-on chicken thighs (about 6 pieces — thighs stay juicier than breasts here)
- 1 tsp salt
- ½ tsp black pepper
- ½ tsp smoked paprika
- 1 tbsp olive oil
For the Honey Glaze
- ⅓ cup honey (raw or pure honey gives the richest flavor)
- 3 tbsp low-sodium soy sauce
- 4 cloves garlic, minced
- 1 tsp fresh ginger, grated (or ½ tsp ground ginger in a pinch)
- 1 tbsp apple cider vinegar
- 1 tbsp unsalted butter
- 1 tsp sesame oil
- ½ tsp red pepper flakes (optional, but highly recommended)
For Finishing
- 1 tbsp fresh parsley or sliced scallions (for garnish)
- Sesame seeds, for sprinkling
The honey and soy form the backbone of this glaze — naturally thick and sticky without any cornstarch needed. The butter rounds out the edges, the vinegar brightens it up, and the sesame oil gives it that restaurant-quality depth.
How to Make Honey Glazed Chicken — Step-by-Step
Step 1: Season and Sear the Chicken
Pat the chicken thighs completely dry with paper towels — this is non-negotiable for crispy skin. Season both sides with salt, pepper, and smoked paprika. Heat olive oil in an oven-safe skillet over medium-high heat until it shimmers, then place the chicken skin-side down. Sear for 4–5 minutes without moving it until the skin is deeply golden and releases naturally from the pan. Don’t worry if it sticks slightly at first — it will release when it’s ready.
Step 2: Make the Honey Glaze
While the chicken sears, combine honey, soy sauce, minced garlic, grated ginger, apple cider vinegar, butter, sesame oil, and red pepper flakes in a small saucepan over medium-low heat. Stir gently until the butter melts and everything comes together into a smooth, glossy sauce — about 3 minutes. It should smell absolutely incredible at this point.
Step 3: Apply the First Glaze and Roast
Preheat your oven to 400°F (200°C). Flip the seared chicken skin-side up in the skillet, then spoon half the glaze generously over each piece. Transfer the skillet directly to the oven and roast for 20 minutes. Don’t worry if the glaze looks a little loose at this stage — it will thicken and caramelize beautifully.
Step 4: Add the Finishing Glaze
Pull the pan out at the 20-minute mark and spoon the remaining glaze over the chicken. The skin should already look golden and sticky. Return to the oven for another 10–15 minutes, until the tops are deeply bronzed and bubbling at the edges. An instant-read thermometer inserted into the thickest part should read 165°F.
Step 5: Rest and Garnish
Let the chicken rest in the pan for 5 minutes before serving — this keeps all the juices locked inside. Scatter sliced scallions and sesame seeds over the top. The glaze in the bottom of the pan is liquid gold — spoon it over the chicken or serve it alongside as a sauce.
Perfecting This Recipe
- Dry the chicken thoroughly before seasoning — moisture is the enemy of crispy skin.
- Don’t skip the sear. Those first few minutes skin-side down build the foundation of flavor and texture for the entire dish.
- Use bone-in, skin-on thighs for the best results. The bones keep the meat moist during roasting, and the skin crisps up in a way that boneless cuts simply can’t replicate.
- Apply the glaze in two stages. One coat at the start lets it soak in; the second coat at the end creates that lacquered, sticky finish.
- Let the glaze simmer gently — boiling it too aggressively can make it bitter. Low and slow is what makes it glossy and sweet.
- If your pan drippings look very dark after roasting, deglaze with a tablespoon of water or chicken broth to loosen them before spooning over the chicken.
Common Mistakes to Avoid
- Skipping the pat-dry step — Wet chicken skin steams instead of crisps. A few seconds with paper towels makes a significant difference in the final texture.
- Overcrowding the pan — If the pieces are too close together, they’ll steam rather than sear. Use a large enough skillet so each piece has breathing room.
- Using low-quality honey — Processed honey with added sugars can taste flat or overly sweet. Pure, raw honey caramelizes more beautifully and has a richer flavor.
- Pulling it too early — The glaze needs time to reduce and lacquer onto the skin. Pulling the chicken before it’s deeply golden means missing out on the best part.
- Skipping the resting time — Cutting into the chicken immediately causes all the juices to run out. Five minutes of patience makes a real difference in moisture and flavor.
Add Your Touch
- Swap the apple cider vinegar for fresh lime juice and add a pinch of chili powder for a citrusy, Southwestern twist.
- Stir a tablespoon of Dijon mustard into the glaze for a honey-mustard variation that works beautifully.
- Add a few sprigs of fresh thyme to the roasting pan for an herby, earthy undertone.
- Use boneless chicken thighs if you prefer easier slicing — reduce the oven time by about 8 minutes.
- For a spicier version, double the red pepper flakes or add a teaspoon of sriracha to the glaze.
- Try it over drumsticks for a fun, party-friendly presentation that’s easy to pick up and eat.
Visit Also: Balsamic Glaze Recipe
What to Serve With This
- Steamed jasmine rice — It soaks up the extra glaze like a dream and makes the meal feel complete.
- Roasted broccoli or green beans — The slight char on the vegetables plays beautifully against the sweetness of the chicken.
- A crisp cucumber salad — Cool, refreshing, and a perfect contrast to the sticky, warm glaze.
- Garlic mashed potatoes — For a heartier, comfort-forward meal that feels genuinely special.
- A cold glass of sparkling water with lemon — Simple, clean, and it cuts through the richness perfectly.
Storing and Serving
Fridge:
Store leftover chicken in an airtight container for up to 4 days. Keep any remaining glaze separately and reheat it gently before spooning over the chicken.
Freezer:
Freeze fully cooked, cooled chicken in a freezer-safe bag or container for up to 2 months. The skin won’t be as crispy after freezing, but the flavor holds up very well.
Reheating:
Reheat in a 350°F (175°C) oven for 12–15 minutes, covered loosely with foil to prevent drying out. Remove the foil for the last 3 minutes to re-crisp the skin. Avoid microwaving if you can — it softens the skin.
Make-Ahead Tip:
The glaze can be made up to 3 days in advance and stored in the fridge in a sealed jar. You can also season and sear the chicken a few hours ahead, then finish it in the oven when you’re ready to serve.
Servings:
This recipe serves 4–6 people, depending on portion size.
Nutrition (Approximate Per Serving)
- Calories: 410
- Total Fat: 22g
- Saturated Fat: 6g
- Carbohydrates: 18g
- Sugar: 16g
- Protein: 34g
- Sodium: 580mg
Nutritional values are approximate and may vary based on specific ingredients and brands used.
Chef’s Helpful Tips
- Bring your chicken to room temperature for about 15 minutes before cooking — cold chicken straight from the fridge cooks unevenly, leaving the outside overdone before the center finishes.
- Watch the glaze closely in the final 10 minutes. The honey content means it can go from perfectly caramelized to overly dark quite quickly at high heat.
- For the cleanest presentation, use a sharp knife or kitchen shears when portioning. The glaze can make things sticky, so wiping the blade between cuts keeps everything tidy.
- Fresh garlic is worth it here. Pre-minced jarred garlic works in a pinch, but fresh garlic gives the glaze a bolder, more aromatic punch that’s noticeably better.
- If the glaze in your pan has thickened too much during roasting, add 1–2 tablespoons of warm water or broth and stir gently over low heat to bring it back to a spoonable consistency.
Frequently Asked Questions
Q1. Can I use chicken breasts instead of thighs?
Yes, boneless skinless chicken breasts work, but they tend to dry out faster. Reduce the oven time to about 22–25 minutes total and check the internal temperature early. Thighs are more forgiving and stay juicier, so they’re the better choice if you have the option.
Q2. What does honey glazed chicken taste like compared to teriyaki?
They’re similar in spirit — both are sweet and savory — but this glaze is a little richer and deeper, with the butter and sesame oil adding layers that teriyaki doesn’t always have. Think of it as teriyaki’s warmer, slightly more indulgent cousin.
Q3. Is this recipe beginner-friendly?
Absolutely. If you can sear chicken in a pan and set an oven timer, you can make this. The glaze comes together in minutes, and the steps are forgiving — there’s no tricky technique required.
Q4. Can I make this ahead for a potluck?
It holds up very well. Roast it fully, let it cool slightly, then reheat in a 350°F oven covered with foil for 15 minutes before serving. The glaze re-activates beautifully. It’s honestly one of the best make-ahead options for a crowd.
Q5. Can I freeze this after cooking?
Yes — freeze fully cooked chicken pieces in a sealed container for up to 2 months. Thaw overnight in the fridge and reheat in the oven. The flavor stays excellent; just note that the skin won’t crisp back up quite the same way after freezing.
Conclusion
Some recipes are just reliable in the best possible way — and this honey glazed chicken is exactly that. It’s the kind of dish that doesn’t require a special occasion to justify making, yet feels special every single time it lands on the table. The sticky, caramelized glaze, the juicy meat, the way it fills your kitchen with that warm, sweet aroma — it all adds up to something genuinely comforting and satisfying.
Whether you’re feeding a hungry family on a Wednesday evening or bringing something impressive to a gathering, this recipe will show up for you. Make it once, and it’ll earn a permanent spot in your weekly lineup. And if it becomes your signature dish — the one people start requesting by name — well, that’s exactly what it deserves.
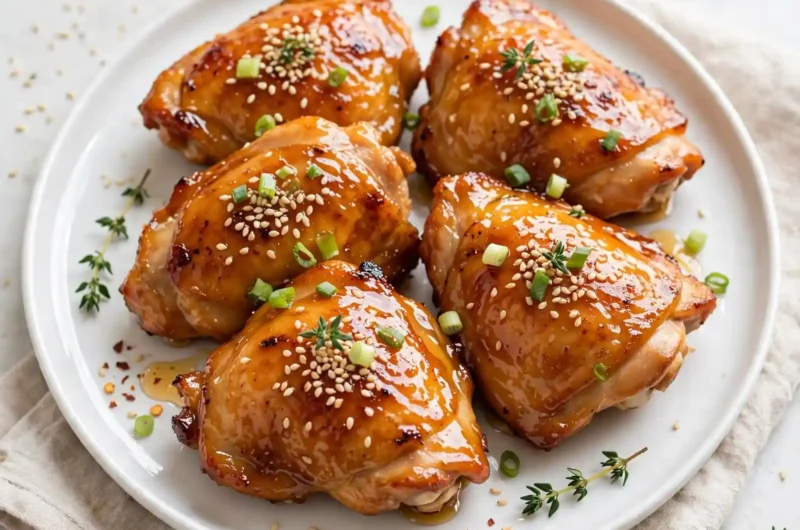
Sticky Honey Glazed Chicken
Course: Trending Recipes4–6
servings10
minutes35
minutes410 per serving
kcal45
minutesCrispy-skinned, tender, and coated in a rich homemade honey sauce, this recipe is your new go-to for any night you want a satisfying, flavor-packed dinner that comes together in under an hour.
Ingredients
Chicken:
2.5 lbs bone-in, skin-on chicken thighs (about 6 pieces)
1 tsp salt
½ tsp black pepper
½ tsp smoked paprika
1 tbsp olive oil
Honey Glaze:
⅓ cup honey
3 tbsp low-sodium soy sauce
4 cloves garlic, minced
1 tsp fresh ginger, grated
1 tbsp apple cider vinegar
1 tbsp unsalted butter
1 tsp sesame oil
½ tsp red pepper flakes
Finishing:
Sliced scallions or fresh parsley
Sesame seeds
Directions
- Pat chicken dry. Season with salt, pepper, and smoked paprika.
- Sear skin-side down in hot olive oil for 4–5 minutes until golden.
- Combine all glaze ingredients in a saucepan over medium-low heat. Stir until butter melts and glaze is smooth, about 3 minutes.
- Flip chicken skin-side up. Spoon half the glaze over the pieces. Roast at 400°F for 20 minutes.
- Remove from oven, apply remaining glaze, and roast another 10–15 minutes until deeply golden and internal temperature reaches 165°F.
- Rest 5 minutes, then garnish with scallions and sesame seeds. Serve with pan drippings spooned over the top.