Perfectly Fluffy Instant Pot Baked Potatoes Your Whole Family Will Love
It was a Tuesday night, dinner was thirty minutes away from being a disaster, and someone had already set the table expecting something warm and satisfying. I dropped four russet potatoes into my Instant Pot, set the timer, and walked away. When the lid came off, the kitchen filled with that deep, earthy steam that only a perfectly cooked potato can produce — and just like that, the evening was saved.
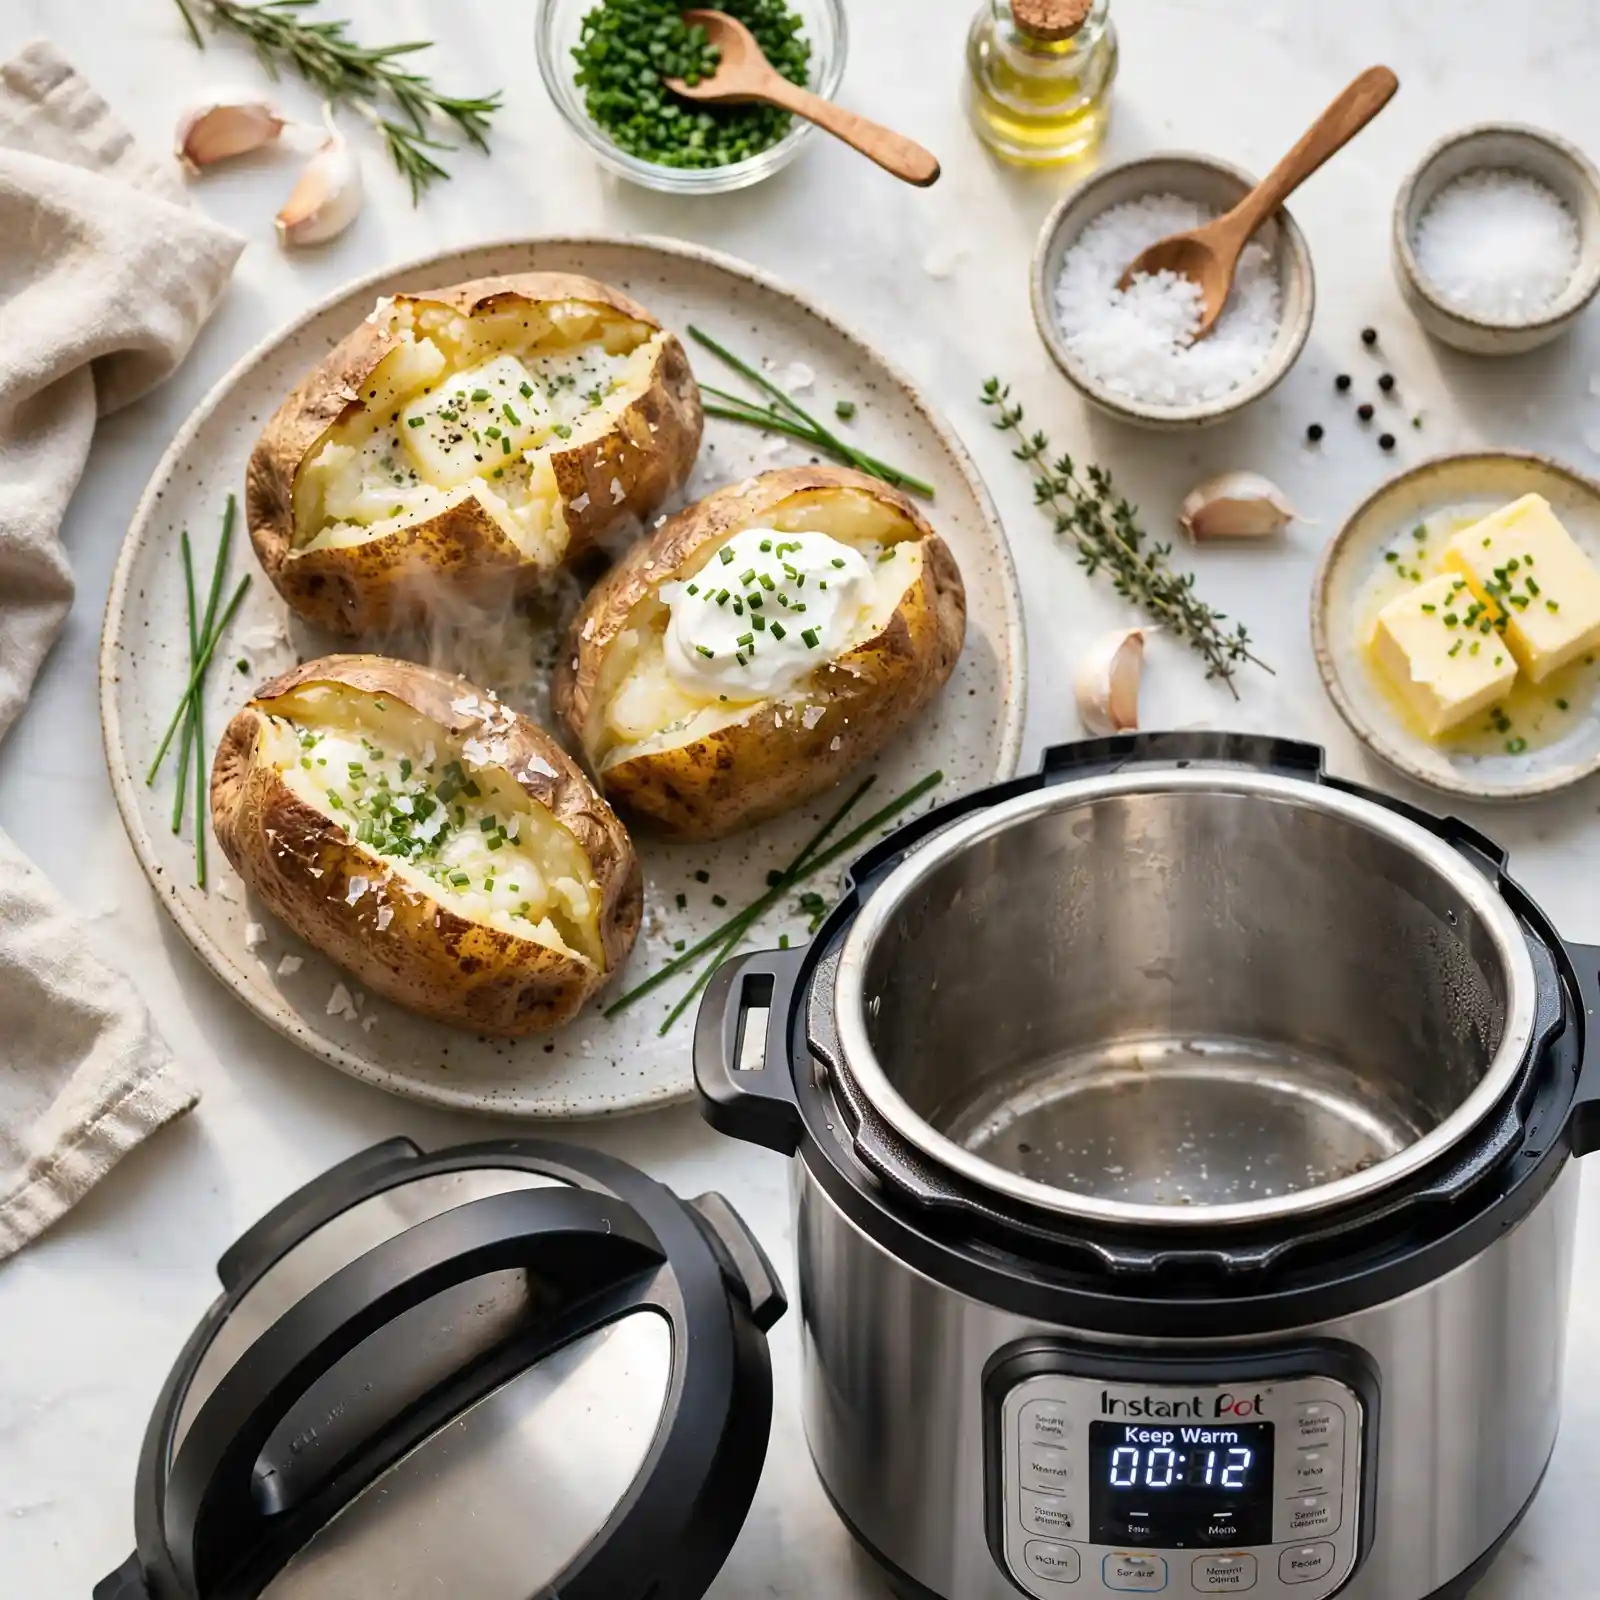
There is something deeply comforting about a baked potato done right. The skin crisps just enough to give you that satisfying crack when you press it open, and the inside — that’s where the magic is. Pillowy, steaming, cloud-soft flesh that practically begs for butter to melt right into it. No dense, gummy center. No undercooked edges hiding under the skin. Just pure, fluffy perfection from the inside out.
Whether you’re pulling together an easy weeknight side dish, setting up a loaded potato bar for game day, or rounding out a holiday spread, Instant Pot baked potatoes belong in your regular rotation. They pair naturally with pressure cooker pot roast, a simple green salad, or a big bowl of chili. Once you make them this way, the oven method is going to feel like a very long wait.
Why You’ll Love This Recipe
Consistently Fluffy Every Single Time
The pressure cooking environment creates steam that penetrates the potato evenly from all sides, eliminating the guesswork that comes with oven baking. You will never cut into one and find a hard, undercooked center again.
Unbelievably Fast for How Good It Tastes
From cold potato to the table in about 35 minutes — and most of that is completely hands-off. The Instant Pot does the heavy lifting so you can focus on your toppings, your main dish, or just sitting down for five minutes.
No Foil, No Fuss, No Babysitting
Forget wrapping each potato individually in foil or rotating them halfway through a 60-minute oven bake. You set it, seal it, and walk away. It’s one of the most satisfying kitchen wins you’ll experience on a weekday.
A Blank Canvas for Any Topping
From classic sour cream and chives to fully loaded baked potatoes piled with cheddar, halal beef strips, and broccoli, the neutral, buttery flavor of a pressure-cooked potato works with absolutely everything. It’s endlessly customizable.
Crowd-Friendly and Scalable
Making dinner for two or feeding twelve? The Instant Pot can handle multiple potatoes at once as long as they fit comfortably in the pot. It’s a reliable, stress-free side dish that works at any scale.
Ingredients
For the Potatoes
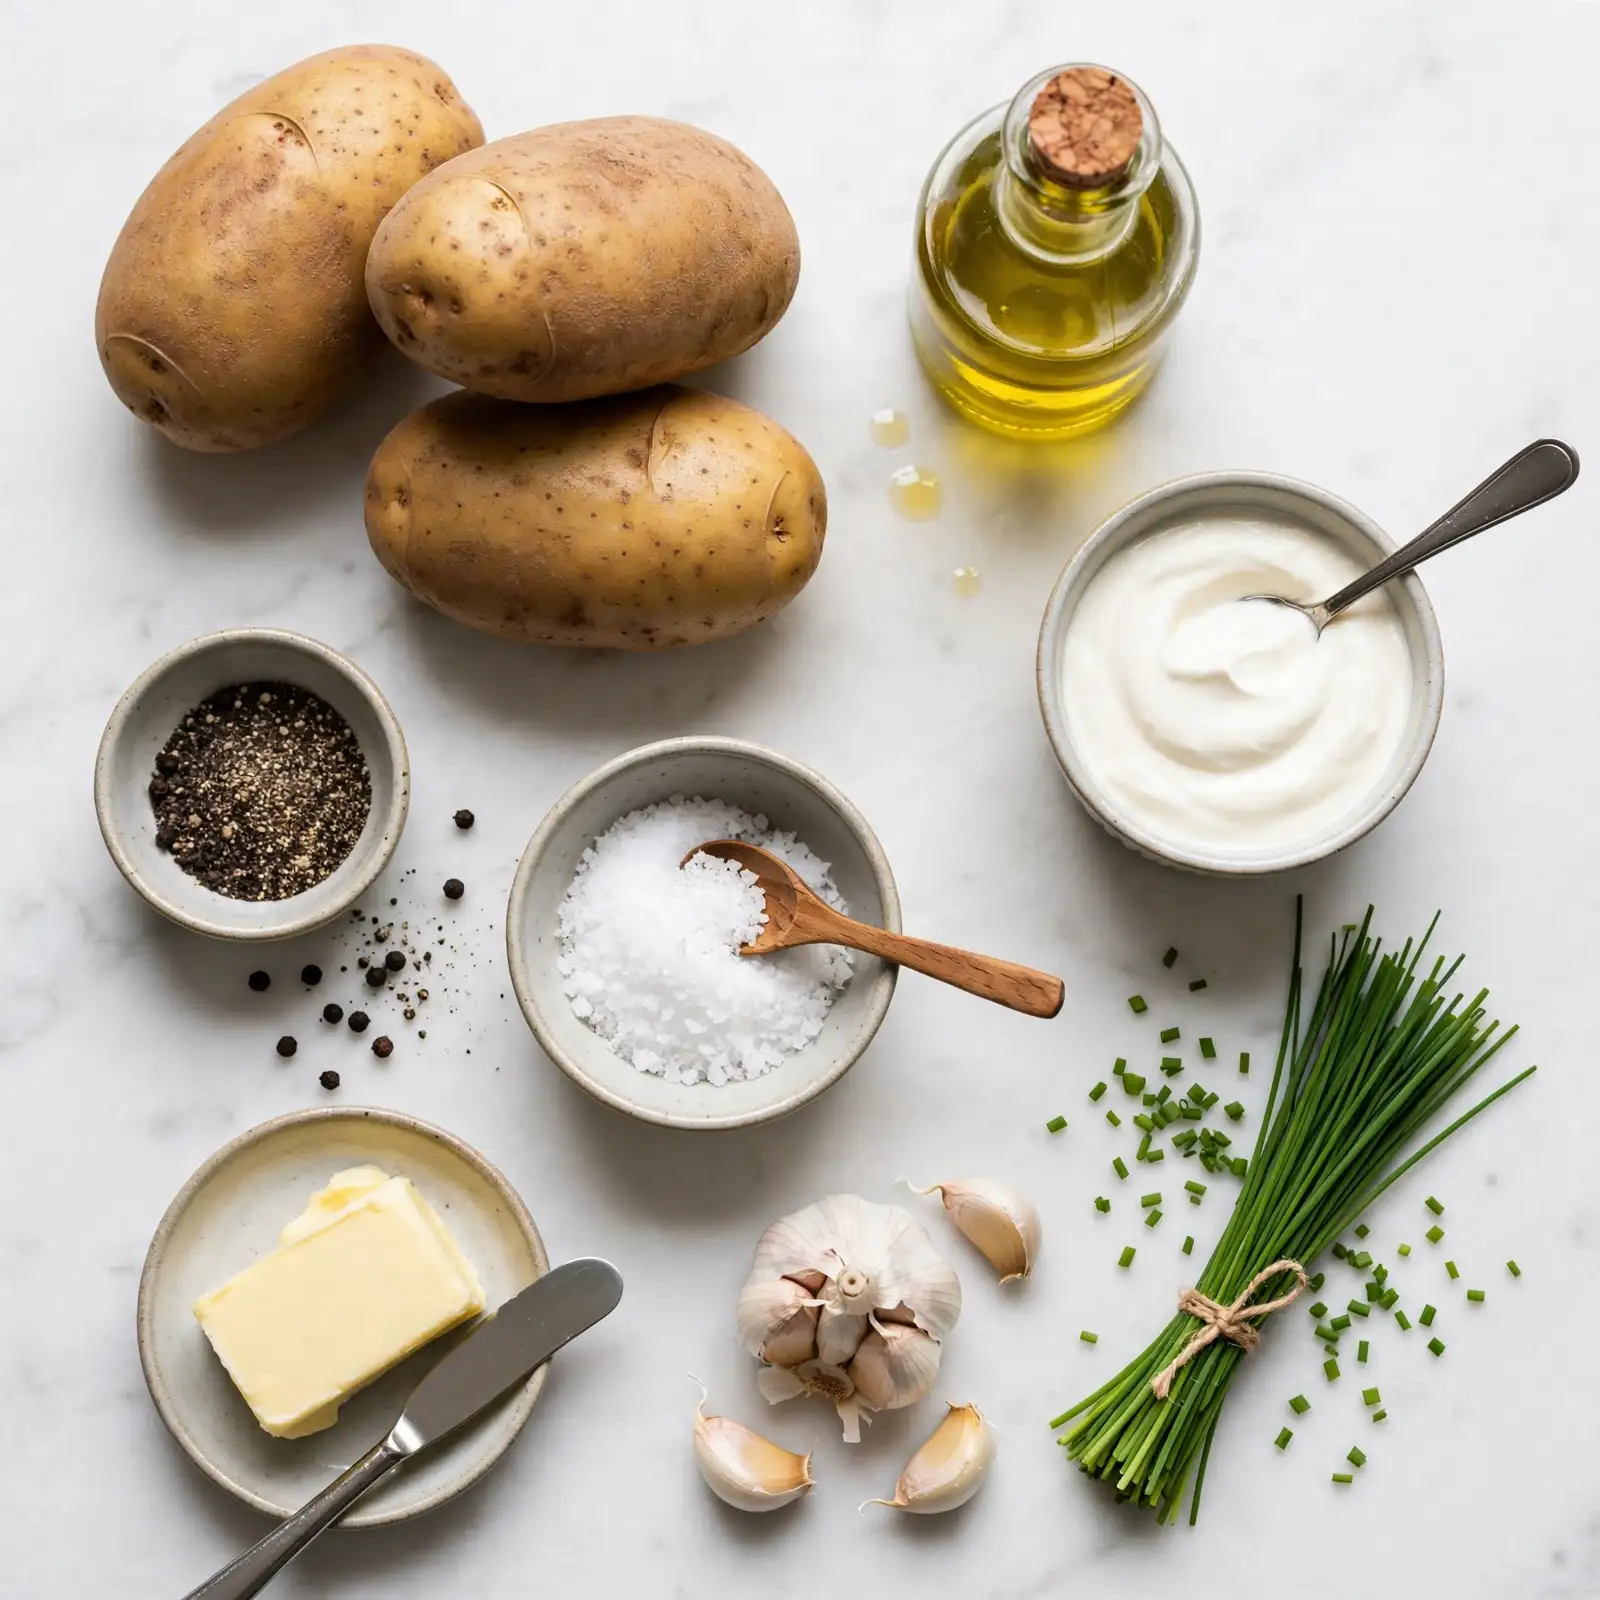
- 4 medium russet potatoes (about 8–10 oz each, scrubbed clean)
- 1 cup water (for the Instant Pot — this is non-negotiable)
- 1 tbsp olive oil (optional, for rubbing the skins)
- 1 tsp coarse kosher salt (for seasoning the skins)
For the Classic Toppings (Optional but Encouraged)
- 4 tbsp unsalted butter (room temperature — it melts faster and more evenly)
- ½ cup sour cream (full-fat gives the richest result)
- ½ cup shredded sharp cheddar cheese
- 4 strips crispy cooked halal beef strips or turkey strips, crumbled
- 2 tbsp fresh chives, thinly sliced
- Salt and black pepper to taste
For a Fully Loaded Version (Optional)
- ½ cup steamed broccoli florets
- ¼ cup diced red onion
- ¼ cup sliced black olives
- Hot sauce or ranch dressing, to taste
The russet potato is the hero here — its high starch content is exactly what creates that ultra-fluffy interior texture that soaks up butter and toppings so beautifully, while the olive oil and salt give the skin just enough flavor and texture to be worth eating.
How to Make Instant Pot Baked Potatoes — Step-by-Step
Step 1: Prepare the Potatoes
Scrub each potato under cold running water, making sure to remove any dirt from the skin. Pat them dry with a paper towel. Using a fork, pierce each potato 8–10 times all over — this allows steam to escape during cooking and prevents any dramatic pressure buildup inside the potato. If you’re using olive oil, rub a light coat over each potato and sprinkle with kosher salt.
Step 2: Set Up the Instant Pot
Pour exactly 1 cup of water into the bottom of your Instant Pot insert. Place the trivet (the metal rack that came with your Instant Pot) inside. Arrange the potatoes on the trivet — they can touch or slightly stack if needed, but try to keep them in a single loose layer for the most even cooking. Don’t worry if they look a little crowded; they’ll cook through just fine.
Step 3: Pressure Cook
Secure the lid and set the valve to the Sealing position. Select the Pressure Cook or Manual setting on High Pressure. Set the timer based on potato size: 25 minutes for medium potatoes (8 oz), 30 minutes for large (10–12 oz). The pot will take about 10 minutes to come to pressure before the countdown begins — that’s completely normal.
Step 4: Release the Pressure
Once the timer goes off, allow the pressure to release naturally for 10 minutes — this resting time lets the interior finish steaming and settles the texture so the inside stays fluffy rather than gummy. After 10 minutes, carefully move the valve to Venting to release any remaining pressure. Don’t worry if a little steam escapes with a hiss — that’s just the last of the pressure clearing.
Step 5: Crisp the Skins (Optional but Worth It)
If you love a slightly crispy skin, this is your moment. Place the cooked potatoes on a baking sheet and slide them under your broiler for 3–4 minutes, turning once, until the skin is dry and just slightly crisped. The skin will give a gentle resistance when you squeeze it. This step is optional, but it takes the texture from great to genuinely restaurant-quality.
Step 6: Cut, Fluff, and Top
Use a sharp knife to cut a deep cross into the top of each potato. Push in gently from both ends to open it up and reveal the steaming, fluffy interior. Add your butter first so it melts directly into the flesh, then pile on your toppings. Serve immediately.
Perfecting This Recipe
- Always use russet potatoes for the fluffiest interior. Yukon Golds are creamier and denser — wonderful for other recipes, but not the ideal choice here.
- Don’t skip piercing the potatoes. It matters for both safety and texture.
- Size consistency matters. If your potatoes vary significantly in size, the smaller ones may be slightly overdone. Try to choose potatoes that are as similar in size as possible.
- The water level is not optional. Without at least 1 cup of liquid, your Instant Pot won’t reach pressure and will throw a burn warning.
- Natural pressure release is key to a fluffy result. A quick release right away can make the interior slightly gummy or watery.
- Broiling is optional but recommended if you care about skin texture. It adds only a few minutes and makes a noticeable difference.
- Room temperature toppings like butter and sour cream will cool the potato down less quickly than cold-from-the-fridge versions.
Common Mistakes to Avoid
- Using too little water — The Instant Pot needs at least 1 cup of liquid to build pressure. Less than that risks a burn warning and unevenly cooked potatoes.
- Skipping the pierce step — Steam builds up inside the potato during pressure cooking. Without those fork holes, you risk a burst potato or uneven texture.
- Cooking all sizes together — A mix of small and large potatoes will result in some being perfectly cooked and others over- or underdone. Sort by size and adjust timing accordingly.
- Doing a quick release immediately — Rushing the pressure release traps moisture in the potato, which can make the inside feel wet or dense instead of light and fluffy. The 10-minute natural release makes a real difference.
- Forgetting the trivet — Placing potatoes directly in the water makes them waterlogged. The trivet keeps them elevated so they steam rather than boil.
Add Your Touch
- Garlic herb butter — Mix softened butter with roasted garlic, parsley, and a pinch of smoked paprika for a savory compound butter that melts beautifully into the potato.
- Buffalo chicken loaded potato — Top with shredded rotisserie chicken tossed in buffalo sauce, blue cheese crumbles, and diced celery.
- Greek-style — Use plain Greek yogurt instead of sour cream, top with diced cucumber, cherry tomatoes, olives, and a drizzle of olive oil.
- Tex-Mex twist — Add black beans, corn, salsa, and a squeeze of lime for a fully loaded Tex-Mex version.
- Steakhouse style — Crispy onions, sour cream, chives, crumbled halal beef strips, and a generous pat of herb butter.
- Vegan version — Use olive oil instead of butter, cashew cream instead of sour cream, and nutritional yeast instead of cheese.
Visit Also: Crab Legs
What to Serve With This
Grilled or pan-seared steak — A classic pairing. The buttery potato balances beautifully against the richness of a good ribeye or flank steak.
Slow cooker or Instant Pot chili — Ladle a scoop of hearty beef or turkey chili right over the potato for a full meal in one bowl.
Roasted chicken thighs — Simple, flavorful, and the kind of dinner that makes people feel genuinely taken care of.
A crisp house salad — Fresh greens, a light vinaigrette, and a perfectly fluffy baked potato on the side is one of those deceptively simple dinners that always satisfies.
BBQ beef ribs or pulled halal chicken — Baked potatoes hold up beautifully next to smoky, saucy proteins. They absorb all the good flavors without falling apart.
Storing and Serving
Fridge: Let the potatoes cool completely before storing. Wrap each one individually in foil or place in an airtight container. They’ll keep well in the refrigerator for up to 4 days.
Freezer: Baked potatoes can be frozen, though the texture changes slightly after thawing — the interior becomes a bit more dense. Wrap cooled potatoes tightly in foil and place in a freezer bag. They’ll keep for up to 3 months. Thaw overnight in the fridge before reheating.
Reheating: For the best results, reheat in an oven at 350°F for 15–20 minutes until warmed through. Microwaving works in a pinch — about 2–3 minutes on high — but the skin won’t crisp back up. Avoid reheating with toppings already added.
Make-Ahead Tip: You can pressure cook the potatoes up to 2 days in advance and store them in the fridge. When ready to serve, reheat in the oven and add toppings fresh. This is perfect for meal prep or large gatherings.
Servings: This recipe makes 4 servings (one potato per person as a side, or one each as a main with generous toppings).
Nutrition (Approximate Per Serving)
Based on one medium russet potato with 1 tbsp butter, 2 tbsp sour cream, and a sprinkle of cheese. Toppings vary.
- Calories: 320
- Total Fat: 14g
- Saturated Fat: 8g
- Carbohydrates: 42g
- Sugar: 2g
- Protein: 7g
- Sodium: 290mg
Nutritional values are approximate and may vary based on specific ingredients and brands used.
Chef’s Helpful Tips
- Potatoes straight from the fridge cook more evenly than those left at room temperature — cold potatoes hold their shape better under pressure.
- Don’t overbake. Cooking beyond 30 minutes for a medium potato can make the skin pull away from the flesh and the interior turn slightly watery. Stick to the timing guidelines.
- For clean toppings, score the cross deeper than you think you need to — it makes the fluffing step much easier and gives you more surface area for butter and toppings to sink into.
- Use a trivet, always. It’s not just about following instructions — it genuinely affects the texture. Steam-cooked potatoes are fluffier than boiled ones.
- If the interior feels a little dense, the potatoes likely needed a few more minutes under pressure, or the natural release was cut short. Note the size for next time and add 3–5 minutes to the cook time.
Frequently Asked Questions
Q1. Can I use Yukon Gold or red potatoes instead of russets? You can, but the texture will be quite different. Yukon Golds are naturally creamier and waxier, which gives a denser, less fluffy result. Red potatoes have thin skins and a firm texture — better for potato salad than a classic baked potato experience. For that iconic fluffy interior, russets are genuinely the best choice.
Q2. How does the Instant Pot version compare to oven-baked potatoes? The inside is just as fluffy — maybe even more so — because the pressurized steam penetrates the potato evenly from every direction. The main difference is the skin: oven baking gives a naturally crispier skin, which is why the optional broil step is so worth it if texture matters to you.
Q3. I’m new to using the Instant Pot — is this recipe beginner-friendly? Absolutely. This is actually one of the best first recipes to try in an Instant Pot because there’s very little that can go wrong, the timing is forgiving within a few minutes, and the result is reliably good. Just remember the water, the trivet, and the pierce step, and you’ll be fine.
Q4. Can I make these ahead for a party or potluck? Yes, and they travel well. Cook them up to two days in advance, refrigerate, then reheat in a 350°F oven for 15–20 minutes before serving. Set up a toppings bar and let guests build their own — it’s one of the easiest, most crowd-pleasing setups for casual entertaining.
Q5. Can I freeze these after cooking? You can freeze them, but do it without toppings. Wrap the cooled potatoes in foil, place in a zip-lock freezer bag, and freeze for up to 3 months. Thaw overnight in the fridge and reheat in the oven. The texture will be slightly less fluffy than fresh but still delicious — especially if you’re using them for twice-baked potatoes or mashed potato dishes.
Conclusion
Some recipes earn a permanent spot in your weekly routine not because they’re fancy, but because they’re reliably, quietly wonderful. Instant Pot baked potatoes are exactly that — a side dish that shows up when you need it, delivers every time, and somehow makes everything else on the plate feel more like a meal. Whether it’s a simple Tuesday dinner or a spread for a crowd, they bring that combination of ease and comfort that’s genuinely hard to beat.
Give these a try this week, and don’t be surprised if they become your go-to. Top them exactly the way your family likes, mix it up with a new flavor combination, or keep it simple with just butter and salt — there’s no wrong answer. If you make them, I’d love to hear how you loaded yours up. Happy cooking.
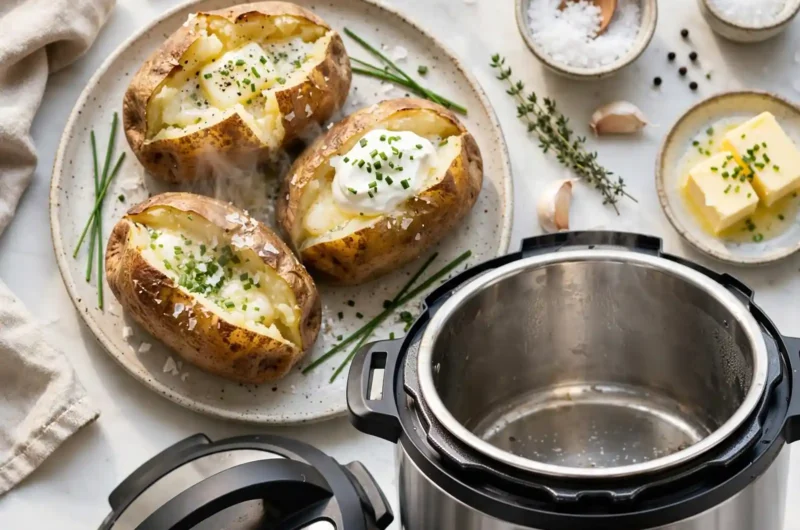
Fluffy Instant Pot Baked Potatoes
Course: Trending Recipes4
servings5
minutes25
minutes320 per serving (with basic toppings)
kcal10
minutes10
minutes45
minutesThese pressure-cooked baked potatoes come out perfectly fluffy and tender every single time — no oven required. Ready in about 35 minutes and endlessly customizable, they’re the ultimate easy side dish for busy weeknights or casual entertaining.
Ingredients
For the Potatoes:
4 medium russet potatoes (8–10 oz each), scrubbed
1 cup water
1 tbsp olive oil (optional)
1 tsp coarse kosher salt
Classic Toppings (Optional):
4 tbsp unsalted butter, room temperature
½ cup sour cream, full-fat
½ cup shredded sharp cheddar cheese
4 strips crispy halal beef strips or turkey strips, crumbled
2 tbsp fresh chives, sliced
Salt and black pepper to taste
Directions
- Scrub potatoes clean and pat dry. Pierce each potato 8–10 times with a fork. Rub with olive oil and season with kosher salt if desired.
- Add 1 cup water to the Instant Pot insert and place the trivet inside.
- Arrange potatoes on the trivet in a single layer.
- Seal the lid and set the valve to Sealing. Cook on High Pressure for 25 minutes (medium potatoes) or 30 minutes (large potatoes).
- Allow natural pressure release for 10 minutes, then carefully switch the valve to Venting to release remaining pressure.
- Optional: Transfer potatoes to a baking sheet and broil for 3–4 minutes to crisp the skins.
- Cut a deep cross in the top of each potato, push open, and top with butter, sour cream, cheese, crumbled halal beef strips, and chives. Serve immediately.